The finished garment
As I haven't found my size or standard alterations yet in TSW patterns I decided to make the top in fabric I wouldn't mind sacrificing to a wadder. The finished garment is good enough from a RTW perspective but when you sew for yourself you expect a higher standard so I consider this a wearable muslin.
Despite my general ambivalence about the colour/pattern and fit of this top it will be put into wardrobe circulation. How often it is worn will determine its lifespan in the wardrobe versus the charity shop bag.
The fabric
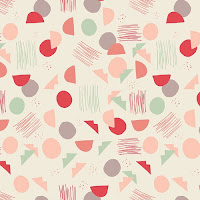
Another AGF cotton jersey this one from their first organic cotton collection Hello, Ollie by Bonnie Christine. It is called Village Tundra in colourway sprout, a 95% cotton 5% spandex knit. A nice weight at 260 gsm and lovely and soft. It came from Stonemountain and Daughter earlier this year.
When I purchased the fabric I really loved it and could see it clearly fitting into my wardrobe. But that strange phenomena happened during its journey across the Pacific ocean, so that by the time it reached New Zealand it was less ideal, the pattern less attractive, even though it will absolutely fit into my wardrobe aesthetic. Why does the excitement of fabric buying sometimes overcome discernment?
The pattern
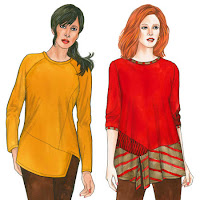
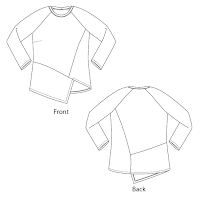
This is The Sewing Workshop Odette and Ivy top pattern. I used Odette in a size small. Odette is described as a pieced top with right front dart and left princess seam, side front and back panels, tapered peplum. Long sleeves have shoulder darts. Neck binding and stitched hems.
The pattern alterations
None - well I cut a size small and used 3/8 inch side seams rather than the required 5/8 inch giving me an extra 1 inch through the body. I also didn't use the neck binding.To choose my size I looked at the finished garment measurements and considered how much ease I wanted. I thought the size small might be just a titch too clingy and am happy with my choice to include that extra inch.
So what alterations should I have done? Quite a few. I have noticed other versions on the web have some of the same challenges. Maybe I will do another post detailing the changes I should have made to this pattern as it would probably be helpful for my aging memory to make the pattern changes whilst they are still fresh in my mind.
The sewing
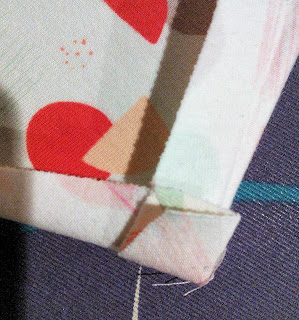
The top was sewn together on the overlocker as normal apart from the hems and neckline which were sewn on the Featherweight with a straight stitch. I was careful to only sew the side seams with a 3/8 inch seam allowance but all other seams were sewn at 5/8 inch. I mitred the corner then hemmed the peplum piece on the two sides before I attached it to the body of the garment as per the instructions which made it easier to handle.Being a bit OCD I love getting the perfect mitred corner. The instructions had you trim the seam allowances but I think that gives you a lumpy mitred corner. Instead I fold the seam allowance open which makes the little square you see in the picture below to give a really flat sharp mitred point a la Louise Cutting.


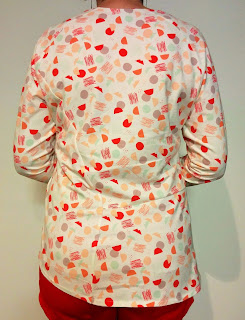


It's a success if it's a wearable muslin. It's certainly a good colour match with the Andrea Moore trousers.
ReplyDelete