Saturday, 15 April 2017

Papercut Bowline NY Circuit Sweater

I was very taken with The Papercut Collective Bowline sweater from the moment I saw it. Being a home grown New Zealand pattern company do feel I should support them.  Although generally I think Papercut are aiming for a younger demographic than me there are a few of their patterns I have bought and made. It has taken me nearly a year since buying the Bowline paper pattern at The Fabric Store to actually create a garment from it.

The finished garment
This is a really great basic t-shirt type top but the bow gives that extra little bit of interest I am always looking for in my clothes.
 
Creates Sew Slow: Papercut Bowline NY Circuit SweaterCreates Sew Slow: Papercut Bowline NY Circuit Sweater

The fabric
I used a cream medium knit, with a pattern of black dots and marigold / beige crosses, for the body of the sweater and the neckband. This fabric is another fantastic AGF cotton knit with 5% spandex, bought last year from The Sewing Workshop.  It is called NY Circuit and makes me think of the punched cards used for programming computers in years gone by.  Love this description by AGF: an elegant palette of azure, marigold and black, Gramercy eloquently captures the magic of the city. Shimmering lights, aerial views and the beautiful circuitry underneath it all create a metropolitan enchantment that sculpts this collection.

AGF Fabrics: Gramercy Collection NY Circuit Ashen

I wanted the bow to be the star of the show so used a black rayon knit from Silhouette Patterns for the sleeves as it makes the body of the top stand out more.

The pattern
Papercut describe the pattern as inspired by seafaring knots and bow waves, our Bowline Sweater offers structure and casual wear rolled into one. The unique pleated front is a show-stopper and would suit print or plain fabric alike. This fun sweater comes with a raglan sleeve, self-waistband and wide cuffs.
Creates Sew Slow: The Papercut Collective Bowline Sweater

It is rated for skilled sewers but I think anyone could make this if they worked slowly and methodically through the pattern instructions and blog tutorial.

The pattern alterations
I used a size small for the shoulders and raglan sleeves tapering out to a medium at the waist and hips.  I think there is enough ease in this top that I could have used the small throughout, even though my measurements align more closely with the medium.

Not being a big cuff fan I eliminated the sleeve and bottom bands by extending the length of the body and sleeves.  I tapered the sleeves to be the same width as the cuff at the wrist. For the body I made a slight high low hem with a 2.5" shirt tail in the back.

The sewing
Not only did I use the pattern instructions, I also followed the picture tutorial on the Papercut blog.  Most of it was simple to sew, it was only the bow that took a bit more thought. The pictures on the blog really helped as I struggled to get a picture in my head for that step from the instructions.  I made mine on the overlocker just using the straight stitch on the sewing machine (with a ballpoint needle) for the sleeve and bottom hems.  I think it would have been easier to sew dart A and seam B using the sewing machine and then use the overlocker when sewing them together. Live and learn.

The styling
Worn with my Andrea Moore doggy skinny pants, and Katie 'n Me jungle print booties with red heels.
Creates Sew Slow: Bowline NY Circuit Sweater

I prefer it with my Andrea Moore black cropped skinny pants and Trippen Fight shoes.
Creates Sew Slow: Bowline NY Circuit Sweater

My beloved started to loose interest in taking photos at this point hence the arty leaning angle.

Saturday, 8 April 2017

Ready to Sew Janis Feather Top

When I sewed the original Janis top it started a number of ideas percolating, so I had to sew another one to explore some of them.

The finished garment
We didn't bother trying to do these photos with my head in them as it makes the photo shoot less frustrating for my beloved.  He does love photography but prefers landscapes (or subjects that don't keep closing their eyes) and his fancy camera. I get him to use my phone for blog photos because it is easier to transfer them into the computer.

I really love this top, the colours and drape are great and my pattern alteration ideas worked out.

Creates Sew Slow: Ready to Sew Janis Feather Top

Creates Sew Slow: Ready to Sew Janis Feather TopCreates Sew Slow: Ready to Sew Janis Feather Top

The fabric
This is a silk jersey purchased from Silhouette Patterns in early 2016.  I only bought a yard for some strange reason so always knew it would have to be paired with another fabric to make a garment. I think it looks good with the white sleeves and curved piece in the side body but I wish there had been enough of the feather fabric for the peplum without needing to piece in a bit of white knit.

The white is a burnout knit which looks great but is a real pig to sew as it curls terribly.  I have no idea where this knit came from or what it is made of.

The pattern
Janis by Ready to Sew is described as a peplum style top with two collar options, both available in short and long sleeves.  It's fitted at the shoulders and falls into a relaxed fit below the bust. I made an adaptation of view one with the round neckline.

The pattern alterations
This top used the same alterations to shoulders and sleeves as the one I made originally, but lowered the front neck edge by another 1/4".  For this version I wanted to use a different fabric in the curved section at the side body and have the peplum sewn on in a straight line.

For the curved waist piece I marked the seam allowances on the front and back pattern pieces then butted them together, matching the seam allowances at the top and bottom of the side seams.  I then used the seam line to draw the shape of the insert piece on light weight sew in Vilene and added seam allowances.  I marked alignment notches on both the front and back body pieces matching them on the insert piece to ensure they could be sewn together properly.

For the peplum the depth was reduced by 2.5".  I also realised that it wouldn't need to be as wide so I measured the front and back pieces with the insert piece in place to determine the circumference of the peplum at the seam. The total circumference was 6" less than for the original peplum, so I removed 3/4" at each side edge.  Both of these alterations were made because the peplum no longer needed to travel around the curved edge at the side seams.

The sewing
Another simple top, apart from fighting the white fabric to lay flat, sewn on the overlocker.  Hems (sleeve, bottom and neck edge) turned under and hemmed with a straight stitch and ballpoint needle in the sewing machine.

The styling
Here it is worn with Meredith green 3/4 pants and Andrea Moore Geisha Point shoes.
Creates Sew Slow: Janis Feather Top

Saturday, 1 April 2017

Silhouette Georgio's Busy City Dress

Unbelievably for me I purchased this fabric from Silhouette Patterns and sewed it up within three months using Georgio's Top also from Silhouette Patterns, lengthened into a dress.  I love this top and have made it a number of times so it seemed natural to lengthen it into a dress.

The finished garment
A great dress although not quite as I envisaged when I lengthened the pattern. I really wanted more of that peplum swish from the hip down.  Apart from having princess seams it doesn't look that different from the dresses made from a mash-up of Silhouette Patterns Sweater Set #195 and Yoga skirt #2010. Once it was finished I did wonder if the Swing dress #4000 wouldn't have given me the image in my head - off to find some fabric to try this idea.

Creates Sew Slow: Georgio's Busy City DressCreates Sew Slow: Georgio's Busy City Dress

The fabric
A French digital print 3oz viscose knit called The Busy City - great graffiti print which I managed to place without inappropriate bits hitting key parts of the anatomy.

The pattern
Georgio's top, pattern number 312 is described as From the Spring 2012 Armani runway, this kimono/princess seam knit top with the peplum hemline is flattering on every figure type. The cup sizing is built into the princess seaming in the front. This pattern is for 1 or 2 way stretch knits and works with all kinds of knit weights. Silk knits, rayon knits, and cotton knits work well.


Creates Sew Slow: Geogrio's top

The pattern alterations
The top pattern was adapted to fit me long ago, from a size 3 D-cup with 1/4" removed from the shoulder at each of the princess seams tapering to nothing where the shaping for the bust starts. This removed the extra fabric from the upper chest hollow.

All I did this time was add 12.5" to the length of all pattern pieces. The pattern pieces were blended out to be 1.5" wider at the new hemline. I was hoping to keep the flared nature of the peplum in this dress but it is lost, maybe because I didn't angle the seams out far enough keeping the gradient of the peplum extended down to the hem. There is possibly another make in my future to achieve that fuller skirt by using the gradient of the peplum to determine the hem width of each pattern piece.

I also altered the neckline to a scoop neck so that I could add a twisted band at the neck.  This is the twisted cowl neck treatment described by Katherine Tilton in the Craftsy Artful T-shirt class.  I only wanted a neck band not a cowl so I only cut my neckband 2.5" wide.  I folded the band in half and marked the quarter points on one side then marked the other side 1.5" away at each of the quarter points and twisted the band so the quarter points matched up. It looks great finished but was a bit tricky to sew this narrow twisting band - maybe I should only have had the marks 1" apart.

Creates Sew Slow: Georgio's Busy City Dress Twisted Cowl

The sewing
The dress was quickly sewn on the overlocker. The only slightly tricky bit was the neckband as mentioned above.

The styling
Nothing really notable about the styling just a simple summer dress for work or play.  More work when paired with my turquoise sandals or maybe city play. Hopefully Summer will stick around for a few more weeks so I can wear it, either with my Untouched World wrap or World bomber jacket.

Creates Sew Slow: Georgio's Busy City DressCreates Sew Slow: Georgio's Busy City Dress

Saturday, 25 March 2017

A Favourite Outfit - the Milly Maris top

I love this outfit but think its time is limited as the colours in the trousers are starting to fade, although they look fine in these photos. So I took some selfies to celebrate the Style Arc Maris top sewn in a Milly silk fabric from Elliott Berman Textiles paired with my Andrea Moore foxy skinny pants and Vic Matie navy shoes.

Create Sew Slow: Milly Maris topCreate Sew Slow: Milly Maris topCreate Sew Slow: Milly Maris top

Sorry about the toilet ambience but the mirror in the bathroom at work is good for headless selfies. Now how do I do a selfie of the back?

Saturday, 18 March 2017

A New Pair of Scissors

I was recently given a very special pair of Ernest Wright and Sons scissors. They are not perhaps what you were expecting being a small pewter brooch from a traditional scissor manufacturer in my old home town of Sheffield, England.  These are a very special pair of scissors because as well as being a gift from a friend they are an example of the modern phenomena of crowd funding.

Creates Sew Slow: Ernest Wright Scissor Pin

A few months ago Ernest Wright ran a Kickstarter project to start production again of their handmade Kutrite kitchen scissors first produced in the 1960's.  This seemed like a good opportunity to support an old industry with dying skills. Many other people agreed with me as the Kickstarter project raised £248,419 from 3,684 people, way above its original target. After making my pledge and supporting this worthwhile cause I spread the word - letting all of my 22 Facebook friends know!

Cheryll joined the cause to keep the traditional skills and industry alive.  When Cheryll received her traditional Turton kitchen scissors she shared her bounty with me,  giving me one of her pewter scissor pins, which I wear with pride. Just love my scissors, thank-you.

Creates Sew Slow: Ernest Wright Scissor Pin

I have to wait a bit longer for my scissors as the Kutrite scissors are being started from scratch with the dies being made and the blanks forged before being handcrafted into my new kitchen scissors.

If you too would like to support a small family owned business that has been making the finest hand-made scissors and shears since 1902, in a once great manufacturing city famous for its stainless steel, they make some great sewing and embroidery scissors.

The Ernest Wright and Son website contains two fascinating and informative videos about the art of scissor making.  One is by the late Shaun Bloodworth, also a Sheffield local and the other is a BBC interview.

Saturday, 11 March 2017

Ready to Sew Janis Sand Bar Top

This is the Janis top view one by Ready to Sew a relatively new French company. One of the myriad sewing blogs I read (sorry can't remember which one) had made a Janis top and I am always looking for woven fabric tops with a different style so thought I would give it a go. I am quite tempted by the Jacob design too but wanted to actually make a Ready to Sew pattern before I purchased any more.

The finished garment
Whilst this pattern is suitable for a woven fabric I wanted to try it with the drape of a knit fabric first. I loved the style but was a bit worried it would hang on me in an unflattering way.

My beloved took many photos of me in this top but I really am a hopeless model.  Hardly any were usable because I had my eyes closed.  In this one I might look like a little tin soldier in need of the loo but at least I have my eyes open.
Creates Sew Slow: Janis Sandbar top

Creates Sew Slow: Janis Sandbar top - backCreates Sew Slow: Janis Sandbar top - front

Creates Sew Slow: Janis Sandbar top - side

The fabric
The fabric is an Art Gallery Fabrics (AGF) knit called Sand Bar Lagoon from Stonemountain and Daughter purchased in September 2016. It is a gorgeous cotton knit with 5% spandex, very soft with great drape and a good weight (260gsm). Definitely not a flimsy see through knit.
AGF Coastline Range: Sand Bar Lagoon 260gsm knit

The pattern
Janis is described as a peplum style top with two collar options, both available in short and long sleeves.  It's fitted at the shoulders and falls into a relaxed fit below the bust. I made view one which has a round neckline.
Ready to Sew Janis top

This is a PDF pattern which needs to be printed and taped together (all 33 A4 pages).  Not my favourite way of passing the time but I am adjusting to the pattern assembly task for the convenience of a new pattern instantaneously - no waiting for the post.

This PDF is layered so you can choose to print all sizes or in my case the three sizes you think you might be. The benefit of this is that you don't have lots of confusing lines on the paper so less chance of accidentally cutting the wrong size.

The pattern alterations
I printed three sizes of the pattern (36, 40 and 44). To determine which size would be best I compared the pattern pieces to my TNT woven top.  Whilst I was using a knit I only wanted it for the drape not the negative ease.

For the back I cut out the size 36, with the length of the 44. For the front I cut out the size 36 at the shoulder tapering out to the 44 at the side seam. For the peplum piece I cut out the size 40 which worked well with the two different sizes used for the front and back. I didn't use the sleeve provided instead using my favourite knit sleeve (from Silhouette Patterns Sweater Set #195) which has already been altered for a forward shoulder.

The front neck edge was lowered slightly by about ¼".  The width of the shoulder seam was reduced by ½".  A forward shoulder adjustment was made, raising the back shoulder seam ½" at the armhole edge tapering to nothing at the neck edge and lowering the front shoulder seam by the same ½".  The armhole was then redrawn using my favourite knit armhole to account for the changes. Whilst I used my favourite knit armhole and corresponding sleeve the armholes on this top are very close to my knit armhole depth.

If I ever use the facing pieces I will need to redraw the front facing to take into account the changes made to the neck edge.

There are a number of changes I would make to this top if it is ever sewn in a woven fabric. One of which is the back armhole shape, which I would lower 1¼", because in my opinion the original armhole in a woven would seriously limit your range of arm movement. The front armhole for me would be fine but bear in mind that I do a forward shoulder adjustment which removes ½" at the front and adds it to the back. The front piece would also need an FBA, which would create a bust dart.  It may also be useful to add waist darts at both front and back to limit the poufiness, which would then mean a reduction in the width of the peplum equivalent to one waist dart.

The sewing
Nothing really to say about the sewing.  I can't comment on the standard of the pattern instructions because I didn't use them.  This is a really easy sew on the overlocker which went together quickly. The hems and neck edge were turned under 3/8" and sewn with a single row of straight stitch on the sewing machine.

The styling
Creates Sew Slow: Janis Sandbar top & Blot wrap
Janis top worn with NYDJ Nina ankle jeans in colourway bluegrass with Untouched World Blot merino wrap in colourway inspire. The turquoise wedge sandals are by Pretty Things Inside.

Creates Sew Slow: Janis Sandbar top & MerinoMink poncho
Same outfit with a different wrap this one is Untouched World Merino Mink two tone poncho in colourway mist. Merino Mink is a blend of Merino wool, brushtail Possum fibre, silk and angora. It is divine to wear - light but snuggly warm.

Saturday, 4 March 2017

Vogue 1836 Issey Miyake Gorgeous Raincoat

I have been a long time fan of Issey Miyake patterns and have collected many over the years but they seem to be something to look at and are not often made.  There have been many pattern cleansing sessions during my sewing career but the Issey Miyake patterns always survive waiting for their moment. So 20 years after it was initially published Vogue 1836 saw the light of day destined to become a Gorgeous raincoat.

The finished garment
This raincoat took five months to finish.  I started it in October 2016 originally intending to take it with me to America but I ran out of time to hem it, make the buttonholes and sew on the buttons. There were also some bits that weren't quite as I wanted, which I would have lived with if it had been finished for the trip. Instead it sat unfinished in the pile on my sewing table.  In February 2017 it was unearthed and finished. Now we just need some rain - a bit late for the trees which have already shed their leaves but green grass would be nice.
Creates Sew Slow: Vogue 1836 Issey Miyake Gorgeous RaincoatCreates Sew Slow: Vogue 1836 Issey Miyake Gorgeous Raincoat

Creates Sew Slow: Vogue 1836 Issey Miyake Gorgeous RaincoatCreates Sew Slow: Vogue 1836 Issey Miyake Gorgeous Raincoat

Creates Sew Slow: Vogue 1836 Issey Miyake Gorgeous Raincoat

The fabric
Vogue 1836 from 1996 just seemed ideal for this raincoat fabric from Gorgeous Fabrics purchased a few years ago.  The only small fly in the ointment is that the pattern requires 5 yards of fabric and I had 3. Now generally Vogue patterns are generous in their fabric allowances but there was no way to eke this garment out of 3 yards. Although I probably came close with the ease I removed!! So off to The Fabric Store to find a complementary fabric to use with it. In the end I only needed this fabric for the sleeves and the extra bits inside like the pockets, back stay and front button flange.
Creates Sew Slow: Vogue 1836 Issey Miyake Gorgeous Raincoat fabric
Gorgeous fabric right side
Creates Sew Slow: Vogue 1836 Issey Miyake Gorgeous Raincoat fabric
Gorgeous fabric wrong side
The pattern
This pattern is advanced, described as an oversized, slightly flared, unlined coat, above mid- knee, has front extending into standing back collar with concealed buttonholes, slightly forward shoulder seams, front shoulder pleats, front button flange, welt pockets, button/tab, back stay, mock bands, stitched hems, longer than regular length sleeves with fold-back cuffs, belt carriers with button/loop.
Vogue 1836 Issey Miyake oversized unlined coat

Oversized is a slight understatement the size small is nearly twice the circumference of my actual body measurements, although some of that is the collar.

One of the questions Pattern Review asks is does this look like the pattern envelope and the answer would have to be sort of.  It has the bones of the pattern envelope look just with less ease and a much shorter belt.

The pattern alterations
The fact that I am happy with this garment can be attributed to the teachings of Peggy Sagers of Silhouette Patterns.  What I learnt from Peggy after watching her free (and purchased) videos was a real epiphany for my sewing, increasing the frequency of satisfaction with the finished garment hugely.

I no longer make up a garment based on my supposed size on the pattern envelope but by the actual garment measurements that are usually printed on the pattern tissue of Vogue patterns, taking into consideration the amount of ease I prefer. Who knew you could have an ease preference. Well of course you do - when you buy ready-to-wear and the garment drowns you a smaller size is tried on or you leave the garment in the shop. I always loved the look on the pattern envelope but hated my oversized sewn garments without making the connection as to why. I also make garments using my under bust measurement then make an FBA as this fits my shoulders (and frame) much better.

For this pattern the finished garment measurements for the size small were: bust 76"; hip 72"; back length 36¾". I removed 22" of garment ease and added 2¼" to the length. Four inches of ease were removed at each side, front and back straight down from the shoulder seam (total 16") and a further 3" were removed from the collar piece (total 6"). I traced my pattern onto lightweight sew-in interfacing and folded out the unwanted ease as can be seen in the photo. A garment with nearly 30" of ease and with such dropped shoulders I know from experience would drown me and create the look of a child playing dress-up in mum's clothes.
Creates Sew Slow: Vogue 1836 Issey Miyake - pattern front

As the pattern had so much ease there was no need for an FBA. The pattern also had a slightly forward shoulder seam so I didn't need to make that adjustment either.

There was a further inadvertent pattern alteration due to a fixation about having the fabric "stripe" run vertically which caused challenges when cutting out.  After spending some time puzzling how I could place the body garment pieces on the fabric cross grain so that the "stripes" were vertical the perfect solution suddenly appeared. Actually by this stage I had forgotten about placing the front body pattern piece on the fold at the collar centre back.  Forgetting this key instruction led to removing 1¼" from the collar at centre back (the unplanned but now required seam allowance).

I used the longest length for the belt but it is still much shorter than the one in the picture on the pattern envelope.

The sewing
I actually used the pattern instructions to make this garment. Sometimes they caused puzzlement which I worked through and other times I did my own thing as I couldn't solve the puzzle.

There are many pattern markings of different shapes and sizes.  I used tailor tacks to mark them on the garment but used the same colour thread and had to keep referring to the front pattern piece as I sewed to identify which tailors tack represented the different markings.

The coat is unlined so I wanted the inside to look as neat as the outside. Luckily the pattern uses faux flat felled seams (sew the seam wrong sides together with a 5/8" seam allowance, trim one side of the seam allowance to ¼" and fold the larger seam allowance around the smaller one and edge stitch).

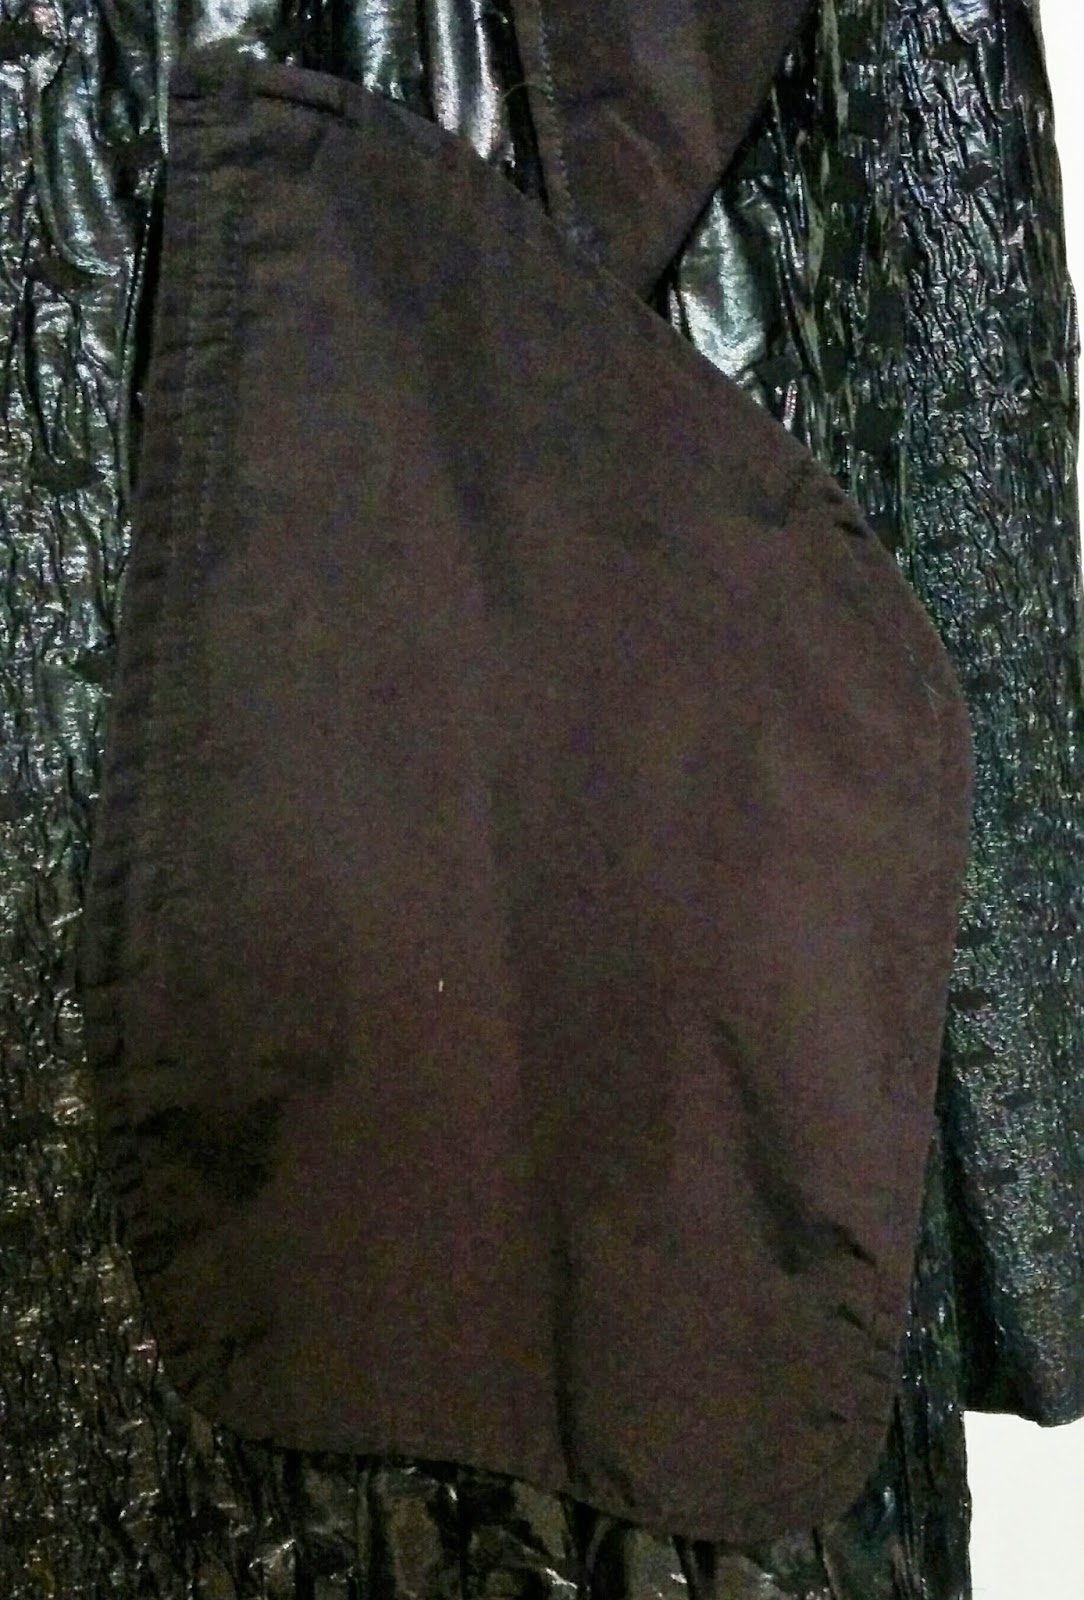
The single welt pockets caused confusion, much searching on the internet, through books and watching of YouTube videos. Not sure why they caused so much head scratching. Maybe I am too used to the Peggy Sagers method.  Issey uses a method closer to that illustrated by Oliver and S. Eventually enlightenment dawned and I was able to follow the instructions to create a neat welt pocket, including enclosed edges created by a french seam on the pocket bag.  The other clever thing is the pocket support which attaches to the front flange and the pocket. This keeps the pocket bag in place and stops it sagging.


Creates Sew Slow: Vogue 1836 Issey Miyake - pocket bag
Creates Sew Slow: Vogue 1836 Issey Miyake - welt pocket


Creates Sew Slow: Vogue 1836 Issey Miyake - pocket support

In October I followed the pattern and had gathers at the neck seam at centre back.  This was one of the not quite right parts of the garment which when I came back to the coat in February I decided to fix.  The gathers were sufficiently bulky to stick out and give me a strange lump on the back of my neck under the collar. Out came that essential sewing tool the quick unpick. Undoing this neck seam had the added advantage of removing an oopsie pleat in the fabric at the shoulder where the neck and shoulder seam meet. A 3¼" box pleat was created and the neck seam re-sewn.  Originally the box pleat was only stitched down 3" from the neck edge but looking at the extra fabric across the back I decided to stitch the box pleat down to the waist.  This effectively removed a further 6½" of ease and solved the large tucks of fabric near the armhole caused by excess fabric across the back width, another bit I didn't like about the October version of the garment.
Creates Sew Slow: Vogue 1836 Issey Miyake - box pleat

The back stay lays much flatter with the box pleat too.
Creates Sew Slow: Vogue 1836 Issey Miyake - back stay

At the collar centre back there is a button and loop so that the collar can be folded in half. The collar folds over the button down to the neck edge.
Creates Sew Slow: Vogue 1836 Issey Miyake - collar button


The belt has a button loop to secure it to the belt carriers but I didn't like the fact that the button loop is on the public side of the belt.  So when I came back to the coat in February I made a second set of smaller belt carriers at the side seams for the button loop to use and be hidden under the belt.  In the end the button loop didn't have a button I used a 6mm press stud fastener instead. I also added a belt carrier at centre back secured into the bottom of the box pleat.
Creates Sew Slow: Vogue 1836 Issey Miyake - button loop

Creates Sew Slow: Vogue 1836 Issey Miyake - back belt carrier