Showing posts with label Issey Miyake. Show all posts

Wednesday, 21 March 2018

Vogue 2056 Issey Miyake Poppy's Patchwork Jacket

My progress has not been stellar in making the pieces for the Pattern Review wardrobe contest in fact the deadline has been and gone with only three garments made. I had such high hopes of making six garments in six weeks. Oh well there is clearly more in my life than just sewing.

I finished a top the first week of the contest whilst away for the weekend in Westport. Must dig it out of the wardrobe, iron it and take a picture - maybe even produce a blog post as it was a new to me pattern company. Then the last weekend of February I made another pair of Megan Nielsen Flint trousers (also not blogged - maybe next week). Then my Issey Miyake jacket took me two weekends to finish (and as long to produce a blog post).  That left two blouses and a pair of trousers to make in a week. This was never going to happen as on average I can make a garment per week and the trousers needed to be made in a less precious trial fabric before I made the "good pair".

As the pieces of the six in six wardrobe came from my 2018 travel wardrobe plans (apart from this jacket and the Megan Nielsen Flint trousers) I will finish the garments and maybe even do a post in the spirit of the wardrobe contest. I am normally quite motivated by a deadline but neither the wardrobe contest nor the match your shoes contest provided enough deadline incentive for me to finish on time to enter.

I was slightly distracted last weekend by new fabric purchases. As well as finishing the buttons and buttonholes on my IM jacket I also made two tops but with the newly purchased fabric not part of the travel wardrobe. Oops - so much for sewing with a plan.  Although tenuous I could possibly incorporate one or both of these tops into my travel wardrobe!

The finished garment

I did think that this would be a good Summer garment but as we are starting to head into Autumn I paired it with more trans-seasonal clothing.

Creates Sew Slow: Vogue 2056 Issey Miyake Poppy's Patchwork Jacket
Preparing to fly away
Creates Sew Slow: Vogue 2056 Issey Miyake Poppy's Patchwork Jacket
Ok when unbuttoned
Creates Sew Slow: Vogue 2056 Issey Miyake Poppy's Patchwork Jacket
Not sure about the extra fabric folds when buttoned
Creates Sew Slow: Vogue 2056 Issey Miyake Poppy's Patchwork Jacket
The back with the little sticky out bit at the bottom of the centre back seam
Creates Sew Slow: Vogue 2056 Issey Miyake Poppy's Patchwork JacketCreates Sew Slow: Vogue 2056 Issey Miyake Poppy's Patchwork Jacket
How fortuitous the jacket goes with a dress from my travel wardrobe.

The fabric

This is a Liberty Murray loopback sweatshirting in design Poppy's Patchwork colourway B from The Fabric Store.

Creates Sew Slow: Vogue 2056 Issey Miyake Poppy's Patchwork Jacket

The fabric was bought last year and I really loved the colours but now it is made into a garment I am a bit ho hum about it.  Will let the jacket have a rest in the wardrobe and see if the love comes back.

The sewing pattern

Vogue 2056 is a single sized (14) old Issey Miyake pattern copyrighted 1988. The pattern is for a skirt, shorts and top. I felt, in 2018, the top had more of an outerwear look to it than something I would put under a jacket. The top is described as very loose fitting with front, back, long sleeves and collar cut-in-one and stitched hems.

Creates Sew Slow: Vogue 2056 Issey Miyake Poppy's Patchwork JacketCreates Sew Slow: Vogue 2056 Issey Miyake Poppy's Patchwork Jacket

The Sewing Workshop also produced a version of this top as the Origami Blouse which I also have in my pattern stash. This pattern has the added advantage of being multi-sized but I wanted to make the original Miyake version so persevered with a few alterations.

The pattern alterations

There is plenty of room in the body of this jacket (54" at the bust) so the changes I made were for style.

First off I traced the single pattern piece which is the back, front and sleeve onto a light non woven sew-in interfacing, with the seam allowance also marked.  Then I pinned the pattern together to make it easier to visualise the garment to make the changes I wanted.

Creates Sew Slow: Vogue 2056 Issey Miyake Poppy's Patchwork Jacket
Dorothy modelling the pinned pattern piece
I did the pattern tracing and pinning many months before the alterations were made but I had written myself an aide memoire which was pinned to Dorothy for safe keeping.

Creates Sew Slow: Vogue 2056 Issey Miyake Poppy's Patchwork Jacket
How to alter the pattern to remove the 1980's shoulders and get more room at the hip
Creates Sew Slow: Vogue 2056 Issey Miyake Poppy's Patchwork Jacket
The altered pattern
I have annotated the altered pattern piece with the changes made and these can be more easily read if the photo is enlarged.

First off the shoulders - unsurprising for a 1980's pattern the shoulder dart stuck out way past my actual shoulders.  As a soft jacket I didn't want to wear shoulder pads and a dart sagging over the top of my arm is not a good look.  Also whilst the extreme shoulder trend seems to be starting to make a comeback it really isn't my style. To combat the excess I removed 2" of width from the shoulders, using a dart down the back and a tuck in the upper half of the jacket front (photo left side).  These are changes (1) and (2) on the pattern piece.

The lower half of the jacket front needs the same 2" inches removed as the top half otherwise the seam lines won't match.  However extra width at the garment hem is of benefit rather than loosing the 2". So at roughly bust level the 2" was removed with a dart and at garment hem (hip level) the dart opened up to add width. This was achieved by cutting down from the seam line and up from the hem creating a pivot point just above waist level. So closing up the dart at the top automatically opened up the dart at the bottom. This is change (3) on the photo of the pattern piece.

The sleeves were narrowed by removing 1" at the hem, from each side, blended back to nothing at the notch (about where the lengthen/shorten line is).

Once I finished the garment and took it for an outing it became obvious that the sleeves were too short.  It is less apparent when your arms are by your side but when moving about the sleeves slide to three quarter length up my arms. I think this is related to the way the top of the jacket front is stitched to the front facing to create the tuck/pleat of fabric out of the sleeve as well. To combat this I added a 2" cuff and lengthened the pattern piece for the future by adding at the hem rather than the lengthen/shorten line. This is change (5) on the pattern piece.

When I added length to the sleeves I also reduced the width at the hem by continuing the angle of the seam to the new hem length. The photos of the finished garment make it look as though the sleeves are too long now but I am not conscious of this when wearing the jacket.

All of the seam lines had to be trued up once the pattern alterations had been made.

The seam allowance was changed from 5/8" to 3/8".  This is my preferred seam allowance and was fortunate because with the removal of 2" in the shoulder dart the back neck band (sticking out rectangular shape in the middle of the photo on the left hand side) interferes with the back neck edge.

So what would I do differently?  The only thing I can't change in the finished garment and doesn't work unless you wear the jacket buttoned all the time is the centre back seam. As can be seen from the pattern piece the centre back seam has a significant change of direction at the waist. When the top is buttoned this angle is pulled out as the garment sits close to the body but when unbuttoned it sticks out in a strange and unattractive way. I haven't worked out what the solution is to this problem and will need to leave myself a note on the pattern piece in case I make the garment again.

I have also added 1.5" at the hem at centre back tapering to nothing towards centre front as I think the back length is a bit short.  Change (4) on the pattern piece. This new length is for the benefit of any future makes and not something I did for this jacket.

If I ever wore this as a blouse I would need to do something to raise the neckline. Unless I wanted to display my bra to the world and I feel quite strongly that no matter how attractive a bra is they are called under garments for a reason.

The sewing

All seams were sewn first with a 3/8" seam allowance, then overlocked for a neat inside and then top stitched.  For once I actually followed the pattern instructions, in fact you can see them close at hand as I am pinning the garment pieces together in the photo below.

The actual mechanics of the sewing is pretty straight forward. It is the origami folding that requires some mental gymnastics. The sleeve seam is also the seam across the bodice front to join the top and bottom of the front together.  You need to concentrate and make sure you match up the appropriate tailors tacks. Don't skimp on the transference of the patterns markings to the fabric or you will be lost. Even with careful marking I am not sure I stitched the front to the facing as intended to make the folds as my version does not fall as attractively as the pattern envelope suggests.

Creates Sew Slow: Vogue 2056 Issey Miyake Poppy's Patchwork Jacket
Origami folding the jacket to match the sleeve and front bodice seam
Creates Sew Slow: Vogue 2056 Issey Miyake Poppy's Patchwork Jacket
A closer view of the sleeve pinned together
Creates Sew Slow: Vogue 2056 Issey Miyake Poppy's Patchwork Jacket
The front bodice pinned and the mind bending clip to turn the angle into a straight line
I started off using my Bernina 830 but it decided to have one too many mental breakdowns so I put it in the naughty corner and then trecked it into town to the Bernina dealer.  There is enough wrong with it that they shipped it back to head office in Wellington who are apparently downloading its log and sending it back to Switzerland for analysis. So out came the trusty 1953 Singer Featherweight, which has never had a mental breakdown, it just sews along through thick fabric and thin.

My trusty Featherweight has the buttonhole attachment which everyone raves about but I had never used. With the absence of my 830 and the need to finish the garment I got it out of hiding and pressed it into service.  A few practice buttonholes were needed to get the hang of how the buttonholer worked but once again it worked perfectly.  Every buttonhole the same.  No tantrums because some bits of the jacket are thicker than others. It was easy to go around each buttonhole twice (or as many times as I wanted). The nerves were more present at the point of cutting the buttonholes open (I was good and used my buttonhole cutter rather than the quick unpick).

Creates Sew Slow: Vogue 2056 Issey Miyake Poppy's Patchwork Jacket
Three perfect buttonholes
Given the colours in the jacket I choose to use three different (in size and colour) buttons.  This seemed like a really good idea at the time but now I am not so sure. Why does it look so different when the buttons are sewn on? They looked great when I was playing with options.

Creates Sew Slow: Vogue 2056 Issey Miyake Poppy's Patchwork Jacket

The only interfacing used is a 3" strip applied to the front facings to support the buttons and button holes.

I enjoyed a meditative bit of hand stitching to finish the hems and hold the front facing to the garment front.  The pattern instructions have you machine stitch these but I didn't want the line around the garment.

The outfit of the day

Not an outfit of the day but I did think I should take a picture of my Issey Miyake jacket with my Issey Miyake Rock Sandals. When thinking about which outfit I should pair this jacket with I immediately thought of the AGF Bloom Montage knit dress used in the original Rock sandal post. From the distance of memory the colours in this dress seemed ideal.  When put together the colours of the dress are just that little bit off so they really clash. Even my beloved thought this was a less than stellar outfit and his colour choices can be decidedly iffy. Here is the photographic evidence of my never to be worn together again outfit.
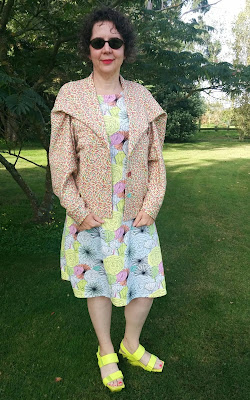
Creates Sew Slow: Vogue 2056 Issey Miyake Poppy's Patchwork Jacket

Sunday, 18 February 2018

Match Your Shoes - United Nude Issey Miyake Rock

Being a matchy matchy girl having shoes that go with my outfit is essential. I did go through a phase of just trying to have black shoes and wearing them regardless of my outfit colour, which didn't last long due to my inner shoe fanatic and love of colour. When I discovered United Nude the shoe wardrobe increased significantly.

I intended to enter the Pattern Review 2018 Match Your Shoes Contest. That didn't quite work out due to a small technical difficulty with the dress and only having the photographer available at weekends. Or rather me only being available to the photographer at weekends. Having started down the road of thinking about matching shoes and outfit a blog post seemed the natural conclusion.

The shoes

United Nude Issey Miyake Rock Sandal in colour lime. I had ogled these for many months before finally making the online purchase and they are fabulous. Different to look at but so well balanced and comfortable to wear. Being a platform you get the added height without tottering around on 4" heels (although I do that too).  The shoes give me 3.5" of added height with a less than 2" incline front to back - easy peasy to walk in. Added bonus is that the straps across and around your foot are fastened with velcro so you can alter them to be comfortable for you (and secure so you don't fall off your high heels). I am extra careful walking down the aircraft steps in these as they look like the sort of shoes you break your neck in!

Creates Sew Slow: Match Your Shoes - United Nude Issey Miyake Rock

Outfit one - Silhouette Patterns #4000 Swing Dress

Creates Sew Slow: Match Your Shoes - United Nude Issey Miyake Rock

Creates Sew Slow: Match Your Shoes - United Nude Issey Miyake RockCreates Sew Slow: Match Your Shoes - United Nude Issey Miyake Rock

So when I thought about making an outfit to go with my Rock sandals this AGF knit (Bloom Montage Light designed by Sew Caroline) was an immediate contender, using Silhouette Patterns #4000 Swing Dress.


First hurdle was I thought I bought 2 yards of this fabric to make a dress, yet when I came to lay out the pattern I discovered I only had 47". This is less than the 1.5 yards I usually buy for a top. Luckily the fabric was long enough for the dress but not wide enough and there was nothing left for the sleeves. So I altered the width of the skirt to maximise the available fabric and thought I would change from set in sleeves to a cut on cap sleeve.

Any sensible person would have stopped there and used a different pattern.  The TNT Home Sewing World Cut, Make and Trim tee extended to dress length would have been ideal. But no as is typical for a Yorkshireman I stubbornly pursued my original plan with the Swing Dress and drafted some cap sleeves.  I didn't even have the nous to use the aforementioned TNT tee pattern for the cut on sleeve. When I came to sew the side seams it was obvious that sewing the hem on the cap sleeve would be impossible. So I chopped the extra off and found another fabric to use for the set-in sleeves. This simple knit dress took me all day Sunday to sew due to the faffing around, with no time left for photographs.

But it does look good with my sandals.

Outfit two - Megan Nielsen Flint trousers with Untouched World merino knit singlet

Creates Sew Slow: Match Your Shoes - United Nude Issey Miyake Rock

The Flint trousers have been great in this year's hot summer weather and the colours in the print make them very versatile - a great addition to my wardrobe.

The Untouched World merino singlet has had a rather unfortunate life. The first time I wore it I dripped a single drop of coffee on it and permanently dyed it.  I tried numerous stain removal remedies to no avail. The first time it was washed it also acquired a slight black tinge (it was washed on a 30℃ wash but with a pair of black trousers).  Luckily I prefer the colour it is now to the bright citrus colour it was. To hide my coffee drip I added a few felt flowers.  I am not entirely happy with the placement of the flowers but as each flower is only attached with three colonial knots they are easily removed and positioned differently.

Outfit three - Home Sewing World Cut, Make and Trim t-dress

Creates Sew Slow: Match Your Shoes - United Nude Issey Miyake Rock

This fabric is interesting - in real life there are lots of different colours in the zigzag stripes one of which is greeny yellow, yet the photograph really emphasises the mint/turquoise colour. This dress has been worn to work with the little jacket and Rock sandals.

The photography venue

I thought it would be fun to take the photos in our paddock using the grape vine as a backdrop.  There are still some grapes that the birds haven't eaten but even close up you can't see them for all of the foliage.

Creates Sew Slow: Match Your Shoes - United Nude Issey Miyake Rock

Creates Sew Slow: Match Your Shoes - United Nude Issey Miyake Rock

And here is the photographer having fun on his own whilst waiting for me to change outfit.

Creates Sew Slow: Match Your Shoes - United Nude Issey Miyake Rock

Saturday, 4 March 2017

Vogue 1836 Issey Miyake Gorgeous Raincoat

I have been a long time fan of Issey Miyake patterns and have collected many over the years but they seem to be something to look at and are not often made.  There have been many pattern cleansing sessions during my sewing career but the Issey Miyake patterns always survive waiting for their moment. So 20 years after it was initially published Vogue 1836 saw the light of day destined to become a Gorgeous raincoat.

The finished garment
This raincoat took five months to finish.  I started it in October 2016 originally intending to take it with me to America but I ran out of time to hem it, make the buttonholes and sew on the buttons. There were also some bits that weren't quite as I wanted, which I would have lived with if it had been finished for the trip. Instead it sat unfinished in the pile on my sewing table.  In February 2017 it was unearthed and finished. Now we just need some rain - a bit late for the trees which have already shed their leaves but green grass would be nice.

Creates Sew Slow: Vogue 1836 Issey Miyake Gorgeous RaincoatCreates Sew Slow: Vogue 1836 Issey Miyake Gorgeous Raincoat

Creates Sew Slow: Vogue 1836 Issey Miyake Gorgeous RaincoatCreates Sew Slow: Vogue 1836 Issey Miyake Gorgeous Raincoat

Creates Sew Slow: Vogue 1836 Issey Miyake Gorgeous Raincoat

The fabric
Vogue 1836 from 1996 just seemed ideal for this raincoat fabric from Gorgeous Fabrics purchased a few years ago.  The only small fly in the ointment is that the pattern requires 5 yards of fabric and I had 3. Now generally Vogue patterns are generous in their fabric allowances but there was no way to eke this garment out of 3 yards. Although I probably came close with the ease I removed!! So off to The Fabric Store to find a complementary fabric to use with it. In the end I only needed this fabric for the sleeves and the extra bits inside like the pockets, back stay and front button flange.
Creates Sew Slow: Vogue 1836 Issey Miyake Gorgeous Raincoat fabric
Gorgeous fabric right side
Creates Sew Slow: Vogue 1836 Issey Miyake Gorgeous Raincoat fabric
Gorgeous fabric wrong side
The pattern
This pattern is advanced, described as an oversized, slightly flared, unlined coat, above mid- knee, has front extending into standing back collar with concealed buttonholes, slightly forward shoulder seams, front shoulder pleats, front button flange, welt pockets, button/tab, back stay, mock bands, stitched hems, longer than regular length sleeves with fold-back cuffs, belt carriers with button/loop.
Vogue 1836 Issey Miyake oversized unlined coat

Oversized is a slight understatement the size small is nearly twice the circumference of my actual body measurements, although some of that is the collar.

One of the questions Pattern Review asks is does this look like the pattern envelope and the answer would have to be sort of.  It has the bones of the pattern envelope look just with less ease and a much shorter belt.

The pattern alterations
The fact that I am happy with this garment can be attributed to the teachings of Peggy Sagers of Silhouette Patterns.  What I learnt from Peggy after watching her free (and purchased) videos was a real epiphany for my sewing, increasing the frequency of satisfaction with the finished garment hugely.

I no longer make up a garment based on my supposed size on the pattern envelope but by the actual garment measurements that are usually printed on the pattern tissue of Vogue patterns, taking into consideration the amount of ease I prefer. Who knew you could have an ease preference. Well of course you do - when you buy ready-to-wear and the garment drowns you a smaller size is tried on or you leave the garment in the shop. I always loved the look on the pattern envelope but hated my oversized sewn garments without making the connection as to why. I also make garments using my under bust measurement then make an FBA as this fits my shoulders (and frame) much better.

For this pattern the finished garment measurements for the size small were: bust 76"; hip 72"; back length 36¾". I removed 22" of garment ease and added 2¼" to the length. Four inches of ease were removed at each side, front and back straight down from the shoulder seam (total 16") and a further 3" were removed from the collar piece (total 6"). I traced my pattern onto lightweight sew-in interfacing and folded out the unwanted ease as can be seen in the photo. A garment with nearly 30" of ease and with such dropped shoulders I know from experience would drown me and create the look of a child playing dress-up in mum's clothes.
Creates Sew Slow: Vogue 1836 Issey Miyake - pattern front

As the pattern had so much ease there was no need for an FBA. The pattern also had a slightly forward shoulder seam so I didn't need to make that adjustment either.

There was a further inadvertent pattern alteration due to a fixation about having the fabric "stripe" run vertically which caused challenges when cutting out.  After spending some time puzzling how I could place the body garment pieces on the fabric cross grain so that the "stripes" were vertical the perfect solution suddenly appeared. Actually by this stage I had forgotten about placing the front body pattern piece on the fold at the collar centre back.  Forgetting this key instruction led to removing 1¼" from the collar at centre back (the unplanned but now required seam allowance).

I used the longest length for the belt but it is still much shorter than the one in the picture on the pattern envelope.

The sewing
I actually used the pattern instructions to make this garment. Sometimes they caused puzzlement which I worked through and other times I did my own thing as I couldn't solve the puzzle.

There are many pattern markings of different shapes and sizes.  I used tailor tacks to mark them on the garment but used the same colour thread and had to keep referring to the front pattern piece as I sewed to identify which tailors tack represented the different markings.

The coat is unlined so I wanted the inside to look as neat as the outside. Luckily the pattern uses faux flat felled seams (sew the seam wrong sides together with a 5/8" seam allowance, trim one side of the seam allowance to ¼" and fold the larger seam allowance around the smaller one and edge stitch).

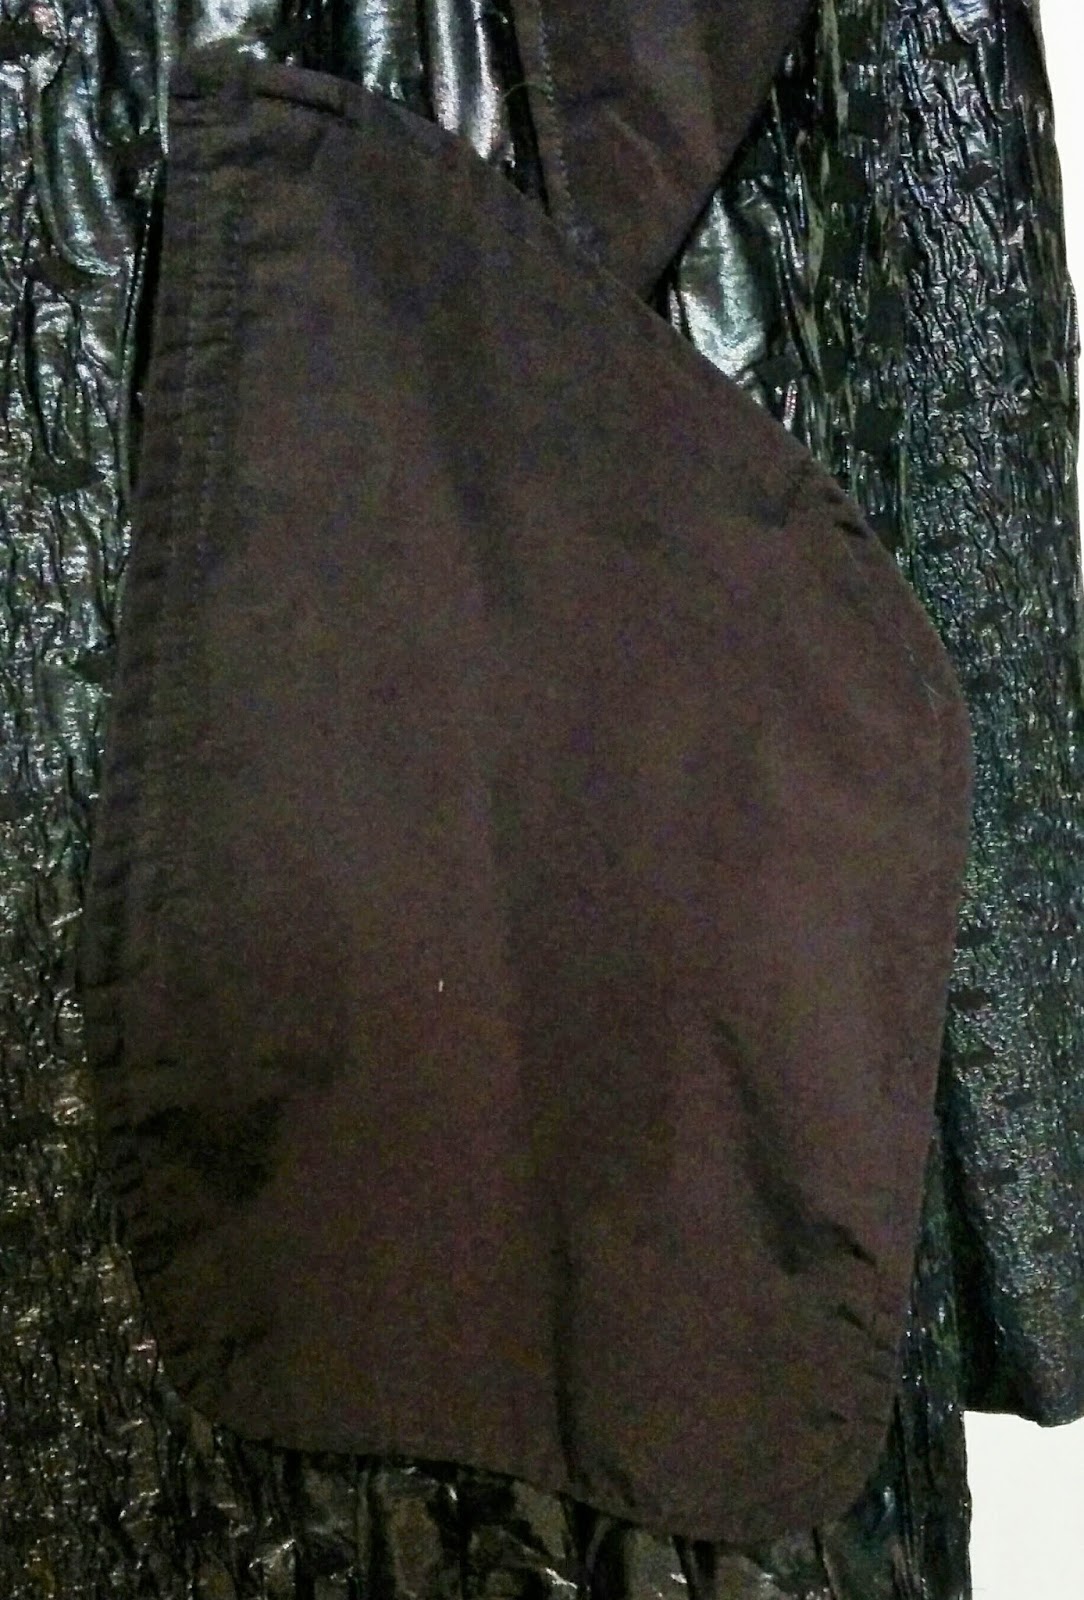
The single welt pockets caused confusion, much searching on the internet, through books and watching of YouTube videos. Not sure why they caused so much head scratching. Maybe I am too used to the Peggy Sagers method.  Issey uses a method closer to that illustrated by Oliver and S. Eventually enlightenment dawned and I was able to follow the instructions to create a neat welt pocket, including enclosed edges created by a french seam on the pocket bag.  The other clever thing is the pocket support which attaches to the front flange and the pocket. This keeps the pocket bag in place and stops it sagging.


Creates Sew Slow: Vogue 1836 Issey Miyake - pocket bag
Creates Sew Slow: Vogue 1836 Issey Miyake - welt pocket


Creates Sew Slow: Vogue 1836 Issey Miyake - pocket support

In October I followed the pattern and had gathers at the neck seam at centre back.  This was one of the not quite right parts of the garment which when I came back to the coat in February I decided to fix.  The gathers were sufficiently bulky to stick out and give me a strange lump on the back of my neck under the collar. Out came that essential sewing tool the quick unpick. Undoing this neck seam had the added advantage of removing an oopsie pleat in the fabric at the shoulder where the neck and shoulder seam meet. A 3¼" box pleat was created and the neck seam re-sewn.  Originally the box pleat was only stitched down 3" from the neck edge but looking at the extra fabric across the back I decided to stitch the box pleat down to the waist.  This effectively removed a further 6½" of ease and solved the large tucks of fabric near the armhole caused by excess fabric across the back width, another bit I didn't like about the October version of the garment.
Creates Sew Slow: Vogue 1836 Issey Miyake - box pleat

The back stay lays much flatter with the box pleat too.
Creates Sew Slow: Vogue 1836 Issey Miyake - back stay

At the collar centre back there is a button and loop so that the collar can be folded in half. The collar folds over the button down to the neck edge.
Creates Sew Slow: Vogue 1836 Issey Miyake - collar button


The belt has a button loop to secure it to the belt carriers but I didn't like the fact that the button loop is on the public side of the belt.  So when I came back to the coat in February I made a second set of smaller belt carriers at the side seams for the button loop to use and be hidden under the belt.  In the end the button loop didn't have a button I used a 6mm press stud fastener instead. I also added a belt carrier at centre back secured into the bottom of the box pleat.
Creates Sew Slow: Vogue 1836 Issey Miyake - button loop

Creates Sew Slow: Vogue 1836 Issey Miyake - back belt carrier