Showing posts with label class. Show all posts

Wednesday, 13 February 2019

Sewing with Peggy Sagers of Silhouette Patterns

In the interests of open disclosure I am a Peggy fan girl. Long long ago one of the blogs I read mentioned this pattern company that produced inspiration / how to videos for their patterns (Silhouette Patterns) which came in B, C and D cup sizing. Whilst I can't credit the blog for the introduction, as my memory has faded, I do thank them from the bottom of my heart for introducing me to Peggy. Once I started watching the videos and bought a couple of patterns I was hooked. Don't be put off by the photographs on the front of the patterns look at the line drawings. The pattern styles suit me and I appreciate them being well drafted.

I have learnt so much from Peggy Sagers and her video tutorials (both free and on DVD). I have all of the DVDs as well as the Fit 2 Stitch PBS series one to six. Many of the patterns I sew are based on the fit I have achieved with a Silhouette Pattern. My sewing is much less hit and miss than it used to be as I know how much ease I like in a garment, have sleeves and their matching armhole templates which I generally use rather than the one in the pattern and so much more.

When organising my trip to the United States for the International Quilt Festival in Houston I planned to spend two nights in San Francisco as I wanted time to go to both Britex Fabrics and Stonemountain and Daughter Fabrics as well as doing a bit of sight-seeing. Then towards the end of August I discovered that Peggy was holding a two-day workshop in Portland, Oregon the Friday and Saturday I would be in San Francisco. Fortunately I hadn't booked my internal flight and even better I could fly San Francisco to Portland to Houston for pretty much the same price as flying San Francisco to Houston. The logistics weren't ideal but it could be done and I was off to Portland.

The finished garment

Over the Christmas holidays I made another pair of Lana's jeans using the fitting knowledge gained in class. After making the Minnie Mouse jeans I sent Peggy the below photo. The before picture is my Lana's Caesar jeans made in April 2018. I was really happy with the fit when I made them but you can really see the difference the pattern changes made to the overall look of the jeans. Peggy responded to the photo with some advice to remove more inseam length to eliminate the wrinkling at the top of my thighs. I have a piece of fabric already selected to make another pair refining the fit further.

Creates Sew Slow: Sewing with Peggy Sagers of Silhouette Patterns

I was quite excited to notice in the after photo that I actually have a thigh gap. I will sleep much better at night now!!! Although I suspect it is an optical illusion.

There will be a blog post about the making of the Minnie Mouse jeans including the pattern alterations. I did intend to include the making in this post, but it was getting a bit long so thought it best to separate them.

The pre-class instructions

About a month before the class Peggy emailed information to help us get the most out of our two-days with her. Essentially her goal is to make it about what you need, be it fitting, sewing skill, pattern work, fabric choices, or something else. If what you are looking for is help with fitting there is information on the instruction page of the website for muslin preparation for each type of garment (blouse, skirt, dress, jacket, or pant). My initial intention was to make three muslins (woven top, jacket and trousers) with the trousers being my priority. This was well within the five muslin limit set for each student, to allow Peggy time to support everyone through the fitting process.

Unfortunately I was sick with a heavy cold the weekend before I left for America and none of my plans happened. So given that trousers were what I wanted help with most I just took pattern #3600 Ralph's Pant with me as well as the bits and pieces needed to make the muslin. This was an excellent plan because it really enabled me to get the most I was capable of out of the class.

Creates Sew Slow: Sewing with Peggy Sagers of Silhouette Patterns
Silhouette Patterns #3600 Ralph's Pant
The cold travelled with me to the States and I continued being sick all the way through the trip and the first week back in NZ. The cold probably lasted that long because I didn't give my body enough time to rest.

Making the muslin

If you really want to maximise your time with Peggy I wouldn't recommend my approach of tracing the pattern, cutting the calico, and basting the seams at the beginning of the class because it obviously limits the opportunity for fitting and learning. However, as my brain had limited capacity for learning it didn't really make a difference.

The trouser muslin was made with 1" seam allowances (normal ⅜" + ⅝" extra for fitting purposes) on outseams and inseams. I only had the normal ⅜" seam allowance for the front and back crotch and waist even though Peggy recommends all of these should have the extra seam allowance. The pattern has slant side pockets which for the muslin I just incorporated into the trouser front, as instructed.

The muslin was sewn together, leaving the opening to get the trousers on and off in the back crotch seam. The crotch curve was clipped so that it didn't alter the fit of the trousers.

Now we are ready to fit. Peggy tweaks the muslin, you sew the alterations then Peggy tweaks the pattern some more if necessary. If you make lots of alterations it can be better to make a second muslin. Lucky for me the number of changes weren't that great and I could stick with just making the one muslin, especially as it took me two days to achieve what you see here.

Creates Sew Slow: Sewing with Peggy Sagers of Silhouette Patterns

Creates Sew Slow: Sewing with Peggy Sagers of Silhouette Patterns

The tutor

As I have already said I am a fan girl. The class was very professionally run and Peggy was very organised. She even brought a sewing machine from Dallas for me to use in class, which was super helpful.

Peggy's training is not that of the home sewer so sometimes there are misunderstandings due to terminology and the home sewing wisdom we have learnt over the years. As a pattern maker who has worked in industry and uses mainly industry techniques in her sewing she finds some of our home sewing doctrines strange. For example, the FBA which she had never heard of and thinks is fundamentally wrong as you are altering length, circumference and depth to fix a depth fitting issue. I got the impression that many of the people in this class had done classes with Peggy previously and we all seemed to be in tune, familiar with each others sewing language.

I found Peggy to be a really knowledgeable, patient and giving tutor. She was able to manage the different needs of her students and was fair in sharing her time with us all. For the fitting stage we all got a turn at the beginning of class and then we wrote our names on a list as we were ready to be fitted again. Many of the class had brought multiple muslins for fitting and some had brought finished garments for critiquing and advice. It really was as interesting to see what Peggy was doing with other people's muslins as having her fit mine. I would do another class with Peggy in a heartbeat but hopefully next time I won't be sick.

The class

No photography is allowed in class to protect the privacy of the students. Given that we were wandering around in our muslins and not necessarily camera ready this was a very sensible approach. I did mean to take a picture of the classroom but photos for the blog are not something I think about when taking a class so I forgot. The class was held at the Portland Airport at Cascade Station Residence Inn by Marriott. The hotel staff were pleasant and it was a nice comfortable bed to rest in after a hard days sewing.

The details are a bit hazy but the class size was small (10 or 12 of us) which gave Peggy the opportunity to give plenty of attention to each of us. This class, driven by the attendees, was all about fitting but Peggy did give us other sewing tips and insights during our two days.

The class room was a good size to work in comfortably without encroaching on each other's space. The tables were a bit small if you wanted to cut out any fabric but we all managed it when necessary. Even though the room had a wall of windows I can't comment on how good it was for natural light as we kept the curtains closed so we could wander around partly clothed for the fitting sessions.

Despite taking what I thought I needed for the class I ended up using Jennifer's cotton calico for my muslin. Jennifer (my table mate) had purchased a whole roll of it from an Ikea in Europe a few years previously and was more than happy to share.

My fellow class mates were great, chatty but not too noisy and focused on what they wanted to achieve in class. I confess to not interacting a great deal with everyone, as I was trying to limit the spread of my foreign germs, which is a shame because it is always so interesting to meet others that share the same interest.

So if you ever have the opportunity to take a class with Peggy I would highly recommend it, or as a starting point watch her free videos on YouTube (the Silhouette Patterns website also has a place where past webcasts are listed). If you find you can't get enough then there is also a closed Silhouette Patterns Enthusiasts! Facebook group you can join to ask questions / seek advice or model your Silhouette Patterns creations.

Post class entertainment

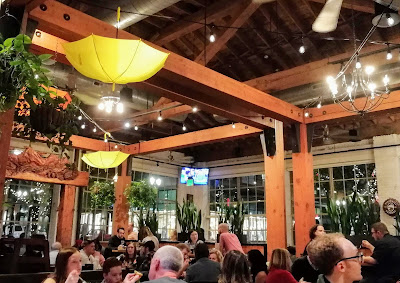
Jennifer and her husband took me into Portland on Friday night for dinner at Deschutes Brewery. This was after some quality time spent at Powell's Books. A whole city block of books which of course meant I had to buy one (or two). Deschutes was the only place I took photographs during my two day visit. I'm really not a natural born picture taker.

Creates Sew Slow: Sewing with Peggy Sagers of Silhouette Patterns
Deschutes Brewery, with brightly coloured umbrellas hanging from the ceiling.
We travelled into the Pearl District from Cascade Station on the Metro. As an ad hoc social observation both the Metro in Portland and the Bart in San Francisco seem much more widely used by all levels of society than the bus in Houston. Cath and I really stand out on the bus in Houston. Yet Houston bus drivers are extremely courteous and helpful, the buses themselves are tidy and we certainly don't feel in any danger from our fellow passengers. I suppose when the whole city is geared around the car there is no impetus to use public transport.

Saturday, 26 January 2019

Houston International Quilt Festival 2018: The Classes

Nearly three months after I returned from the 2018 International Quilt Festival in Houston I am finally writing about the five classes I took.  For the first time no sewing machine was used, any sewing was done by hand and I loved every minute of it (or nearly every minute).

Unfortunately the cold I left NZ with seemed reluctant to leave me and I ended up taking it back to NZ. Most days I managed to participate at full speed but Tuesday was a struggle, when I seemed more intent on dripping my way through a box of tissues than learning. Luckily the tutors were highly skilled, able to adapt to the different needs of their students and let me putter along at my own pace. So without further ado here are the IQF classes of 2018.

Fun and Easy Fabric Printing with Lisa Louise Adams

On Monday (all day) Cath and I did different classes. I printed fabric whilst Cath created a tree of life with Jane Sassaman.

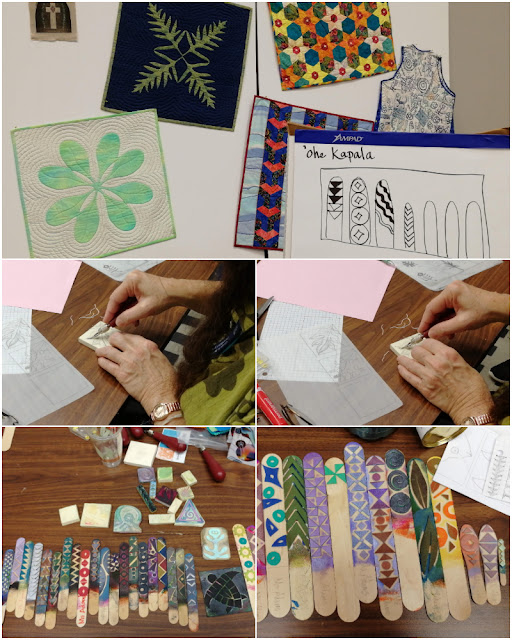
Lisa Louise Adams was a knowledgeable, enthusiastic tutor and it was a pleasure to do a class with her. The technique she taught was based on the ancient Hawaiian art of ohe kapala. In the morning we made our printing sticks and stamps, using them to print onto fabric in the afternoon. It was amazing how much more impactful the stamp was with texture added to the large uncut areas - creating the sea around the turtle in the stamp below was particularly effective.

Creates Sew Slow: Houston International Quilt Festival 2018: The Classes
The art of Lisa Louise Adams; middle demonstrating carving the Speedy Cut for the stamp
Creates Sew Slow: Houston International Quilt Festival 2018: The Classes
The students art - mine is top left
Creates Sew Slow: Houston International Quilt Festival 2018: The Classes
More of the students art

Silk Shibori Beaded Necklace with Glennis Dolce

There are some tutors at Houston who we have taken many classes with over the years. On Tuesday morning we enjoyed another class with one of our favourites Glennis Dolce. The techniques Glennis teaches are varied from indigo dying to creating brooches / necklaces with her silk shibori ribbon.

This time we beaded a piece of the shibori ribbon to create a necklace, adding more or less texture by ruching the ribbon over the silk cord. We could choose the ribbon/bead colour from a number of kits provided for the class. I wanted the red ribbon but wasn't so bothered by the Christmas bead selection so I did buy some other beads at Houston and will probably undo my class effort and start the beading again.

Creates Sew Slow: Houston International Quilt Festival 2018: The Classes
My class piece
Creates Sew Slow: Houston International Quilt Festival 2018: The Classes
Collar (top left) by one of the students using Glennis' shibori ribbon other pieces by Glennis
Creates Sew Slow: Houston International Quilt Festival 2018: The Classes
Collar (top left) by same student other pieces by Glennis
I also indulged at Glennis' booth buying some more shibori ribbon and my extravagance this trip a gorgeous red silk shibori wrap.

Creates Sew Slow: Houston International Quilt Festival 2018: The Classes

Needle Felt Landscape with Vickie Clontz

On the Tuesday afternoon Cath and I were looking forward to hand needle felting a picture. The tutor gave a very fulsome explanation of how to hand needle felt, how to hold the needle, how not to injure yourself etc. What she omitted was any guidance / advice / tutoring on how to achieve the shading and look of the picture. The three pieces of guidance given were: (1) how to achieve the sky with the sun; (2) pictures always have a touch of red in them; (3) how to create the flowers.  The rest was left entirely to us to interpret.

At the end of all classes at Houston students complete a feedback form - one copy goes to the tutor and the other to the IQF Education team. I am not saying anything here that wasn't included on the feedback form. If it had been a technique I was interested in exploring further I would have been more proactive in seeking out the information I wanted. At the end of class I left all of the class materials behind including the foam pad, which didn't need to occupy space in my suitcase on the way home, and just took my "finished" picture. I use the word finished loosely, this is as much as I will ever bother to do to it.

One thing I would say about hand needle felting, it's a great way to expend any aggression, vigorously stabbing a needle into a helpless piece of wool felt.

Creates Sew Slow: Houston International Quilt Festival 2018: The Classes

Japanese Furoshiki Wrapping Cloth with Becky Scellato

Thursday morning was a quiet relaxing opportunity for some hand sashiko. Great tutor who set the scene then kept an eye on all of us as we progressed at our own pace offering assistance and encouragement. I loved the little oasis of peace she created for us amidst the hustle and bustle of IQF. Becky also had some great examples of Boro stitching on display, with sashiko incorporated into some of her Boro patches.

Creates Sew Slow: Houston International Quilt Festival 2018: The Classes
Furoshiki wrapping cloth. Bottom: left class sample; right my class piece.
Creates Sew Slow: Houston International Quilt Festival 2018: The Classes
Japanese Boro stitching by Becky
On Thursday afternoon I had signed up for the mixed media forum but on the day I was too tired to take a meaningful part in what can be quite a fast paced event moving around to look at the different demonstrations. Instead I spent a very enjoyable afternoon wandering around the quilt exhibition whilst Cath participated in Beads are a Blast with Melody Crust.

Beaded Bliss with Katrina Walker

Just like Glennis Dolce it has become something of a tradition to take a class with Katrina Walker. We have done many techniques with her over the years and all have been a lot of fun. This year was no exception. In the morning we dyed our silk scarves and in the afternoon we beaded the ends of our favourite scarf.

I was a bit obsessed with the colour scheme of my shoes and dyed my scarves to match!! I decided to bead the scarf that remained predominantly off-white as the beads were a clear glass. I loved this scarf and really enjoyed dropping the dye on it from a pipette until the end when I added the red, which became too dominant coming out in splashes rather than droplets like the other colours. The red/blue striped scarf is square and I am very tempted to try and incorporate it into a scarf top.

We used Colourhue dyes which are instant set and require only tap water to dilute the concentrated liquid to the desired shade. They are not great when you are trying to get different depths of colour but give fast results and were fantastic in the Houston class setting.

Katrina had a packing disaster for the first time getting her dyes to Houston so we used lots of the dye in class as she didn't want to ship the bottles home again. The class kit came with two long scarves (the beaded one and the blue/yellow one) and we could buy extra scarves from Katrina to continue soaking up her unwanted dyes!

Creates Sew Slow: Houston International Quilt Festival 2018: The Classes
My beaded bliss and dyed scarves
Cath who does a lot of beading was an absolute whizz at this finishing both ends of her scarf in class whilst I had a few problems counting the very simple design and didn't quite finish one end. Even now the longer drops are not longer apart from the second on the left which looks like a mistake rather than the intended pattern. My inability to count in this class wasn't as bad as an Embroiderers' Guild class to English smock a Christmas decoration where I never got past the first row (well I did but had to keep reverse stitching). At the end of the day I gave my pleated fabric to a class mate as I never needed to see it again.

Monday, 5 November 2018

Sewing with Gertie

The international sewing starlet (by her own description) is touring little ol' New Zealand. Whilst Gertie's class was pretty expensive by local standards my girlfriend and I decided to indulge for a bit of fun. This was the prize for working hard.

Thanks to Linda McCarthy Studio for organising the tour, which all started with Jasmine and her Facebook conversations with Gertie.

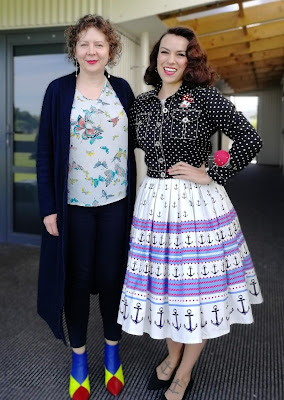
I have to confess to being a bit unsure about taking this class. Not being into retro chic, as you can tell from the class photo. It was however a great way to spend a relaxing couple of days. Gretchen is very down to earth, was attentive to our needs and abilities and provided good sewing advice. Gretchen also managed to sew up a pink jacquard version of the Night and Day dress during her quiet moments.

Creates Sew Slow: Sewing with Gertie
Gretchen and I, posing for photographs before the start of day 2

The finished garment

So there is no finished garment and I wasn't going to publish this post until I had the finished dress to show you. But I decided to publish and be damned as I am still debating about ordering more fabric to re-do the skirt back. I will try hard to finish the dress in time for the end of year round up!

I made a small cutting error with the back skirt pieces, which were cut out after tea on the evening of day one of the class. I cut the piece single layer, carefully lined up the centre back seam on the straight of grain and made sure I had enough fabric left to match the centre back seam when I cut out the other half. Unfortunately it wasn't the centre back seam I lined up on the straight grain but the side seam. It took me over an hour of moving the pattern piece around, not understanding why I couldn't match the flowers before the penny dropped. Because it was a stupid mistake it bothers me especially when the bodice is pattern matched beautifully.

Here is the photographic evidence of the almost beautifully fitting bodice for the Night and Day dress.

Creates Sew Slow: Sewing with Gertie

Creates Sew Slow: Sewing with Gertie

Creates Sew Slow: Sewing with Gertie
The perfectly matched back seam. Hope it still looks like this after the zip is inserted
Creates Sew Slow: Sewing with Gertie
The not perfectly matched skirt centre back seam

The fabric

I have rather a large fabric collection so resisted the lure of a Gertie fabric from Spotlight as well as the discount offered by Bolt of Cloth (Gertie class attendees were given a discount code) and used something from my collection. The fabric must have been bought with a dress in mind as there was plenty, but the dress had not yet materialised. Oh that would be because I am much more prolific at buying than I am at making.  It actually felt good to use something I already had.

Creates Sew Slow: Sewing with Gertie
Liberty of London Carline tana lawn
In all honesty this fabric was probably unused because it is a bit too pretty for me. Not sure what I was thinking when I bought it, during my visit to Liberty earlier this year, but at least I didn't buy the pink colourway. When I found it and realised I had three metres the fates spoke it was destined to be a Gertie Night and Day dress.

The pattern

The class was to teach Gertie's (Charm Patterns) Night and Day dress. Whilst I am not a 1950's glamour dresser there were enough options in this pattern to be excited to try it.

For class Gertie wanted us all to use the sleeveless bodice with the flared skirt and for it to be unlined, although we could choose whether to use the round or square neckline. I chose the round neckline and managed to comply with the sleeveless and full skirt requirement but had to line it. Even though the class size was small (limited to seven) I can imagine it would be challenging to teach and assist us all if we all made different versions of this dress.

From the Charm Patterns website: "This is the most versatile dress pattern you’ll ever own. This vintage-inspired design has two bodices, three skirts, six sleeve styles, and two collars, giving you 72 dress designs in one package. The “Choose Your Own Adventure” style of instructions lets you decide how you’ll finish your dress—neckline facing, all-in-one facing, partial lining, or full lining. Be the heroine of your own sewing escapade!"

Creates Sew Slow: Sewing with Gertie

Creates Sew Slow: Sewing with Gertie

The pattern alterations

We spent quite a bit of time on the first day tissue fitting the bodice. Gertie spent time with each of us tissue fitting the pattern pieces to make sure the bodice fit us well. Darts were moved and lengthened, gaping at the armhole pinched out and shoulder seams lifted. I had made a sway back adjustment before the fitting but wonder looking at the pictures if I should have taken a deeper dart across the back.

Creates Sew Slow: Sewing with Gertie
Front sleeveless bodice: Left - the tissue fitted pattern piece original lines in black pen and changes in orange;
Right - new pattern piece incorporating the changes
Creates Sew Slow: Sewing with Gertie
Back sleeveless bodice - with fewer alterations to make!
I toiled the pattern alterations using the lining fabric before committing to cutting into the fashion fabric. The front waist dart finished quite high so I lowered it an inch for the fashion fabric. It needs further tweaking as now it doesn't remove enough excess fabric beneath the bust. Whilst I have cut out the full skirt it may still shrink to a more A-line shape, as whilst many years since I last wore a full skirt I don't have fond recollections of the look on my body.

The sewing

I debated for some time about which sewing machine to take to class and in the end I used my faithful Singer Featherweight because I was feeling lazy.  The internal justification for that choice was: (1) I couldn't be bothered to bring my Wellington Bernina Activa 210 back to Christchurch for the class; (2) My Bernina 830 is far too big to be moving about especially when I don't need its functionality; (3) My old Bernina Artista 180, which has a trolley bag, is still much bigger to carry about than the Featherweight; (4) the Featherweight was the only hope I had of fitting in with a 1950's theme!!

As I was lining the dress I sewed the seams with a straight stitch and pressed them open then trimmed them using my pinking shears.

Gertie advised us to stay stitch the neckline starting from the shoulder seam to centre back / front then from the other shoulder seam to centre back / front/ This is good advice as it prevents the neckline stretching out whilst you are handling the cut out pieces and when you sew the lining (or facing) to the main fabric at the neckline. Once we had sewn the neckline to the lining (facing) Gertie had us grade the seam (I just pinked mine) and then under stitch before we pressed the neckline.

Once we had sewn the neckline we did the sleeveless armholes in the same way.

There was also a very neat trick to achieve a neat finish for the lapped zipper. Not only is it neat it helps you get the zip aligned at the top without needing a hook and eye.

All of this is detailed in the very comprehensive instructions that accompany the pattern.

The tutor

From Gertie's blog she describes herself as "Author, pattern and fabric designer, teacher, and Instagram influencer. Gretchen Hirsch is a passionate sewist who’s been sharing her love of vintage frocks for over 10 years."

Gertie became widely known through her original blog "Gertie's Blog for Better Sewing" based on the Vogue New Book for Better Sewing and her search for all of the sewing patterns referred to in the book. Now she designs for Butterick Patterns, has her own pattern line Charm Patterns and designs fabric for Michael Miller. All in her inimitable 1950's style.

I felt that the instruction was well balanced and at a pace to suit everyone in the class. Gertie is a true professional able to accommodate the different needs of sewers with quite varied experience.  For some this was the first dress ever sewed and some of us had been sewing for years.

The class

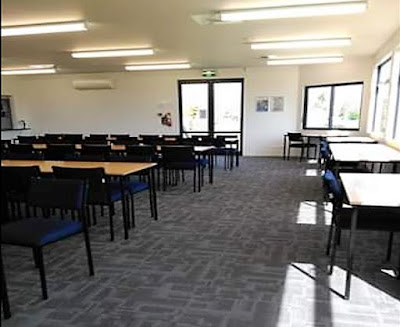
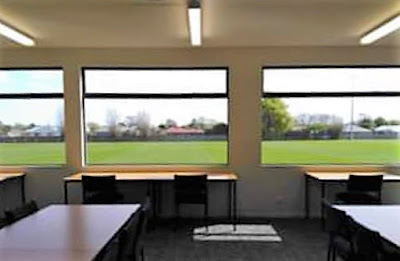
The venue (Woolston Working Mans Club) was great. The room was large and space plentiful. The only slight problem was that the days were very hot and sunny, with the room getting a bit warm even though we had both sets of doors open. We started off at the table looking out of the window. Lots of natural light for those ancient eyes!! The sun drove us to sit facing the wall under the air conditioner.

Creates Sew Slow: Sewing with Gertie
The sewing studio for six of us - we sat facing the back wall to the left of the doors
Creates Sew Slow: Sewing with Gertie
Our original sewing position looking out of the window
Creates Sew Slow: Sewing with Gertie
The 2018 Sew with Gertie NZ Tour Class Photo (from @lindamccarthystudio)
I didn't necessarily learn anything new but I thoroughly enjoyed the ambience and relaxing nature of my two days sewing. As usual I wasn't particularly fast but did surprise myself by not getting the dress sewed in two days. This could have been a mental holding back to enable me to buy more fabric so that I could recut the skirt back. Little things like this can be a significant block when you are a perfectionist.

Field of Remembrance

And on a completely different topic...  I just had to share these photos which are such a moving display of sacrifice.

A Field of Remembrance is established in Cranmer Square each ANZAC Day (25 April) and ends on Armistice Day on 11 November 2018..  Red poppies are placed by each white cross.  The crosses are provided by the Trust and bear the names of more than 4,300 Cantabrians who died in World War I.. Every effort has been made to identify men from the wider Canterbury region who served in other specialist units e.g. the Machine Gunners and include those who served in overseas forces i.e Australian and Great britain. The numbers have increased progressively each year as the men who died one hundred years ago are added to the Field.

The Fields of Remembrance Trust was established in 2012 to honour those who served and died for New Zealand during World War One.  There are also fields of crosses in Auckland, Dunedin and Wellington.

Creates SEw Slow: Sewing with Gertie

Creates SEw Slow: Sewing with Gertie

Saturday, 11 November 2017

Creative Construction Quilt Symposium 2017 Sheena Norquay Shining Circles Class

In early October it was the NZ national quilting symposium "Creative Construction" here in Christchurch. So as I can make the effort to travel to the Houston International Quilt Festival every two years I felt I needed to make the effort to attend the event in my own back yard.

These days I am interested in classes that teach me techniques that can be translated into other creative adventures rather than a straight forward patchwork and quilting class.

For Creative Construction I chose a class with Scottish tutor Sheena Norquay.  This was an excellent class with a wonderful giving tutor. Sheena made sure that we all received as much attention as we needed and that we had enough information to finish our piece at home.  For me the intention was to play in the moment. I have no intention of finishing this piece although I may play around with some more free machine quilting on the painted circles so my samples demonstrate the techniques a bit more thoroughly.


The tutor

According to Sheena's profile on The Quilters' Guild of the British Isles members page she became interested in patchwork in the 1970's and started to quilt by hand and machine in the early 1980's. After being a Primary School teacher for 30 years I gave it up in 2006 and am now a freelance quilting teacher. I also make work for exhibitions and have won numerous awards since the mid 1980's.  My work is varied in subject, style and technique ranging from decorative, symmetrical pieces to landscapes and seascapes. I am inspired mainly by nature and love playing with pattern and free motion quilting.

Creates Sew Slow: Pearls are not always White Sheena Norquay 2009
Pearls are not always White 2009
62 x 103 cm
© Sheena Norquay
Creates Sew Slow: Out of the Blue Sheena Norquay 2008
Out of the Blue 2008
62 x 103 cm
© Sheena Norquay

The class

Shining Circles is a one-day surface design class for intermediate to advanced quilters. This workshop is described as exploring stencilling circles and printing with circles and rings using one or more colours of metallic fabric paint and then free machine quilting using metallic threads.  Different layouts of designs will be shown and discussed.  Students can decide to do a square cushion cover / side of a bag or a long, skinny wall hanging.  Circles, rings and sticky backed Fablon will be provided for printing and stencilling, but you can bring anything circular if you wish.  Free machine stitch techniques taught will include embroidered trapunto, outlined trapunto, incised rings and circles using straight stitched and satin stitching.

My samples

I chose to paint on a black background using two Jacquard Lumiere paints metallic silver and super sparkle, which on the fabric I find difficult to tell apart.


Creates Sew Slow: Shining Circles
I also took some circular rubber stamps and a metallic silver Fabrico stamp pad.

The stamp pads made much less of an impression on the black fabric than the Lumiere. The photos had to be lightened considerably to show the stamp within the Lumiere circle.  On the whole sample piece at the bottom of this post you can hardly see the stamps.
Creates Sew Slow: Shining Circles

Creates Sew Slow: Shining Circles
Cutting circles of assorted sizes out of fablon (sticky backed plastic) then sticking the positive or negative onto your fabric to paint is an inspired idea.  The fablon was much easier to use than freezer paper.

Creates Sew Slow: Shining CirclesThe outer circle for this one was made using a wine bottle cap which had a pretty embossed pattern.  Unfortunately I didn't get my shapes positioned properly to touch edge to edge so I stamped some more to get overlapping wine bottle caps, which ended up just looking messy. Or maybe it is just the imbalance in intensity between the outer bottle tops and the inner rubber stamp.

Creates Sew Slow: Shining CirclesThis is the only one of my shapes that I free machine quilted with pebble quilting in the circle and a haphazard feather around the outer edge.


The masterpiece in its entirety.  Luckily I only went to play not to produce a work of art.

And in the best use of play we learnt a lot including some useful tips and tricks. For example, did you know you get better control of fabric paint for a delicate line by applying it with a tooth pick rather than a paint brush.

It also gave me lots of ideas and you might see fabric painting on a garment soon.

If I sort my pictures out from the exhibitions I might do another post of my favourites some time soon.