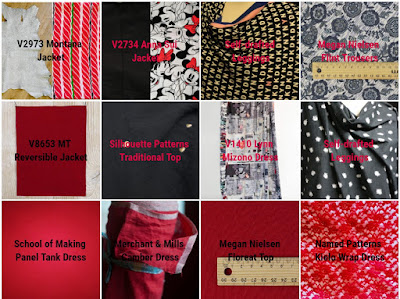
In the PBS programme Fit to Stitch series six episode one, Peggy Sagers the host is given "homework" to create an inspiration mood board - a collage of ideas that can be used to put a fashion collection together. I find that I don't need a mood board just a piece of fabric to generate ideas for a collection. This is true for my quilting as well, where the quilt is generally based on a print fabric with the other fabrics chosen to compliment and boost the feature fabric.
The wardrobe
So I started off with the Vivienne Files classic four by four template and as usual got carried away and produced a four by three grid as well. Some of these fabrics have been long standing members of my stash and others recent purchases specifically for the Minnie Mouse Collection.I can see this red/black/winter white collection being my theme for 2019. I do have a couple of other collection ideas - one based around another piece of fabric and the other inspired by a pair of shoes. These other ideas are germinating and may become an entry for two Pattern Review contests, otherwise it is going to be a red, white and black year.
The finished garment
I just love my Minnie Mouse jeans. They were made in a Liberty print for my UK travel wardrobe and I thought they fit well but not as well as these ones after a bit of expert Peggy fitting. |
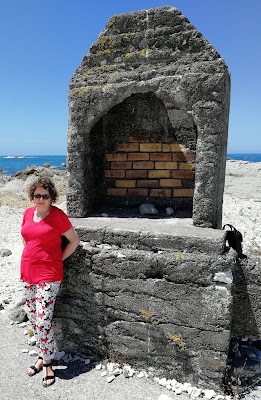
| Minnie Mouse jeans on the Kaikoura shoreline (where you expect to find the chimney breast from a long departed house) |
 |
| Icebreaker butterfly merino tee with Minnie Mouse jeans and United Nude Kiko shoes |
The fabric
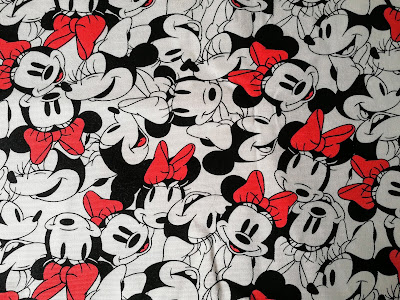
This is a firm cotton fabric found in the home dec section of Fabric Vision. The fabric positively yelled to become a pair of jeans and so it did within a couple of weeks of purchase. Minnie Mouse was washed in Coca-Cola (only the original version works) before use and the fabric softened quite a bit. The washing in Coca-Cola to soften jeans fabric is a Peggy tip so quite apt it was needed for this fabric.After much debate with myself I decided not to make any attempt at pattern matching the tossed Minnie Mouse heads. Having been caught out before I spent ages trying to determine if the fabric had a stripe because I would have tried to match that across my legs. I couldn't find one so just treated the fabric as if it had a nap and laid all the pattern pieces in the same direction.
The pattern
This is a great pattern for a pair of non-stretch jeans, which when made to measure are surprisingly comfortable to wear.The pattern alterations
The pictures are all of my Silhouette Patterns #3600 Ralph's Pant muslin produced in the class with Peggy. I was very naughty and despite seeing the benefits of making a muslin of Ralph's Pant I didn't make one for Lana's Jean I just used the end result of the changes to Ralph's Pant and replicated them in my Lana's Jean pattern.I was going to try and write a long explanation about the fundamentals of Peggy's fitting technique but I don't need to because Peggy has just published a piece on the Silhouette Patterns' website Understanding Fit working through LCD (length, circumference and depth). This is also covered in the webcasts (all of the webcasts are listed here). The webcasts Peggy did with Lora are really helpful, EF The Great Eight shows the pants roughly about 50 minutes in. There is also a Fit to Stitch episode (number 108) about jeans which includes the Coca Cola tip and fitting.
If crotch depth is too long there are wrinkles right underneath the buttocks this is removed by pinching out a dart at hip level at centre back tapering to nothing at the back side seam. This may or may not need to be repeated on the front depending on if you have excess fabric gathering around the crotch.
If there are diagonal wrinkles from below the outseam just below the hip pointing to the inseam this requires a dart at the inseam at the top of the leg tapering to nothing at the back side seam. Because the front and back of the legs are joined at the inseam whatever dart is taken in the back needs to be carried around to the front tapering to nothing at the front side seam.
 |
| Trousers Front Reduce crotch depth ⅞" at centre front tapering to nothing at the outseam (side seam). Remove inseam length by ¾" at the top of the thigh tapering to nothing at the outseam |
 |
Trousers Back
Reduce crotch depth by ⅝" at centre back tapering to nothing at the outseam
Remove inseam length by ⅞" at the top of the thigh tapering to nothing at the outseam |
 |
| Adding ⅜" seam allowance to outseam stitching line and removing excess fabric |
 |
| Original Lana's Caesar Jeans versus Minnie Mouse version |
The sewing
As I had used the trouser muslin to make alterations to my jeans pattern, which are more closely fitted cupping the buttocks rather than falling straight down, I wasn't entirely sure how well the alterations would work. So I put the jeans together slightly differently and basted them in many places so I could check fit before sewing permanently.All seams were sewn at ⅜" on the sewing machine and then the seam overlocked. In order to not have to keep changing thread I set up my Singer Featherweight for the top stitching, with red Gutermann topstitch thread, and a slightly tighter top tension at 4.5 rather than the normal 4.
 |
| Top stitching the inseam |
- Pockets were sewn to the back and I am really proud of the pattern matching I achieved.
- Back and back yoke pieces were sewn together at the centre back seam and overlocked, then the back yoke was sewn to the back.
- Front pockets, fly front and zipper were inserted as per the instructions (Peggy's instructions are excellent and the finished product looks very professional).
- Centre front seam was top stitched before the inseam was sewn (the centre back seam was not top stitched until later).
- Inseam was sewn, overlocked and topstitched.
- Outseams were overlocked then basted together.
- After trying the trousers on I had to alter the back yoke by removing ½" at the top of the centre back seam tapering to nothing where it met the back of the trousers. As well as removing ⅝" from the back yoke piece at each side seam tapering to nothing where it met the back of the trousers.
- Side seam is top stitched from the top of the back yoke to just below the bottom of the pocket bag.
- Waistband attached, buttonhole made (not without its challenges) and button sewn on.
- Last but not least the trousers were hemmed.
 |
| Superb pattern matching on the back pockets |
Outfit of the day
The Minnie Mouse jeans went on a day trip to Kaikoura over the Christmas holidays. This is the first time we had been to Kaikoura since the earthquake in 2016. It was very interesting to see how far the sea bed had risen and the distance to the sea in some places. Kaikoura is suffering from the same fate as Christchurch in that it takes time to replace the damaged buildings but as much as you can tell from a day trip it does seem to have retained its soul.
 |
| Silhouette Patterns #312 Giorgio's red top with #3300 Lana's Minnie Mouse jeans and Hōgl sandals |


The Minnie Mouse jeans are great fun and the fit improvement looks good. I am impressed with you have achieved so far this year even if it doesn't match what you hoped for. Looking forward to seeing the new items in the wardrobe as they appear.
ReplyDeleteThe big problem with my output is that the input is far greater and one day I expect to be buried beneath collapsed piles of fabric.
Delete