I know, it wasn't very sensible to make a short sleeved top in Liberty Tana Lawn for an English winter. In my defence when I first saw the fabric I thought "Cath" so I ignored the seasonal incongruity and forged ahead.
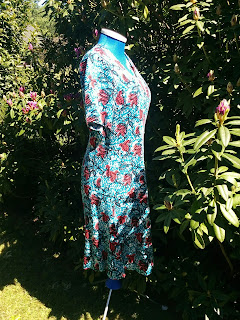
The finished garment
Dorothy had to be pressed into service as the stand in for Cath. I really hope it fits better in real life than in does on Dorothy.I was trying to be artistic taking the photo amongst the rhododendrons completely ignoring the shadows cast by the flowers. Luckily the pink one flowers a bit later than the white one so provided a better backdrop.
The fabric
Another great Liberty Tana Lawn from The Fabric Store. The design is Elevenses in colourway dusky blue. The Japanese feel, cups of tea and in this colourway seemed just perfect for Cath.The sewing pattern
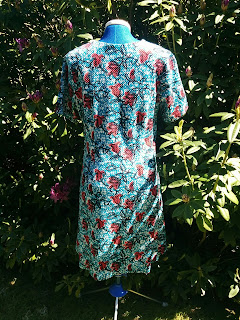
The Rosie top is described as a great top for all occasions. The slight cap sleeve is very flattering and the back inverted pleat gives this top a point of difference.If you are looking for a sewing pattern that doesn't take much fabric I can recommend this one. For the size 10 (as is without alteration) it uses less than 1 metre of fabric.
I am glad I bought this as a PDF, even though I hate taping them together, because I can use the size 10 for Cath and the size 12 for me.
The pattern alterations
I made the size 10 without any alterations. I did omit the button closure in the back and cut the back piece on the fold. The neck opening was big enough to get the top over your head without needing the button.If I made this top for myself it would need: a full bust adjustment; lengthening in the body; and a forward shoulder adjustment.
The sewing
As this was a gift I was extra careful with the sewing. French seams were used throughout but still only with a 3/8' seam allowance. This gave me 1/8" for the wrong sides together seam and 1/4" for the final right sides together seam. This gives a much nicer finish in my opinion than having a 5/8" seam allowance for such a fine fabric. For a thicker fabric I do use a 5/8" seam allowance for a French seam - 1/4" for wrong sides together and then trimmed down, 1/4" for right sides together and 1/8" to allow for turn of cloth.The inside of a garment always looks as good as the outside with French seams.
For the armholes / side seam StyleArc have you sew a narrow hem around the armholes then sew the side seam. Apart from the worry that your side seams won't match up under the arms this is a really neat (tidy) idea. Luckily my side seams did match up.
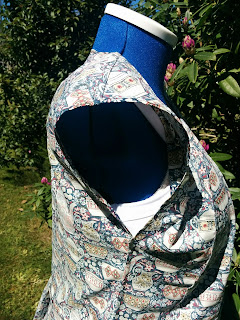
There were some strange folds as you can see in the picture above around the armhole / princess seam. Also I got a strange puffy bump along the shoulder seam which can clearly be seen in the picture below but it didn't appear an odd shape when flat.
I worked on the premise that these are just because Dorothy is the wrong size and they won't appear when Cath is wearing the top.
I stay-stitched 1/4" away from the neck edge then used this as a guide for a double fold to get a really narrow hem. Once the neck edge was sewn I removed the stay-stitching. For the sleeve and garment hems I used the same method but with the stay stitching 3/8" away from the edge. I just love using 3/8" because it is the width of a standard modern presser foot from the needle, so you can just whizz round keeping the edge of the fabric at the edge of the foot. I say modern presser foot because my Singer Featherweight is only 1/8" from the needle to the edge of the foot.
So there it is another successful StyleArc pattern that one day I may sew for myself.


