The finished garment
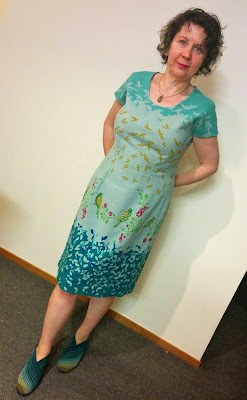
This is the unhemmed version of the garment taken in the garden at Beach Abode on the morning we headed home.
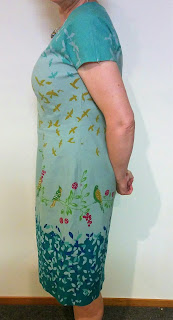
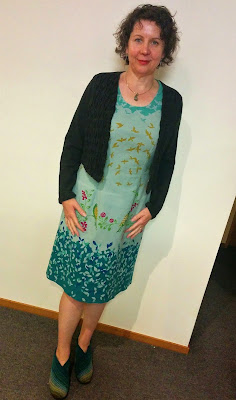
And here is the finished hemmed version, with less picturesque scenery.
It has been worn successfully to work. Successful because it fits well and is really comfortable to wear all day - no issues with the neckline sliding backwards thanks to the forward shoulder adjustment. It also garnered a number of compliments and some incredulity that I made it myself.
Although the weather is now cooler the capped sleeve style suits my new frequent inner boil temperature.
The fabric
This is a wonderful border print linen from Echino purchased at Nancy's Stitch Studio in Wellington many years ago. It was bought to be a skirt but never made because I loved the full width of the fabric and couldn't bear to chop it up. With my new found affinity for dresses it was finally destined to become a finished garment, although it took six months from cutting out to being sewn.
I am so pleased I procrastinated with the skirt idea because I love my finished dress and feel a great deal of satisfaction from using the whole pattern.
To prove I used the whole fabric width the hem is placed along the selvedge and I had to add a piece in at the front shoulder neck edge. The leftover fabric really was scraps and could be thrown away, maybe.
The lining fabric is completely unknown, purchased I suspect for its colour rather than the fabric composition. I bought it soon after the Echino fabric so I could line the skirt and luckily there was enough for a dress lining.
The pattern
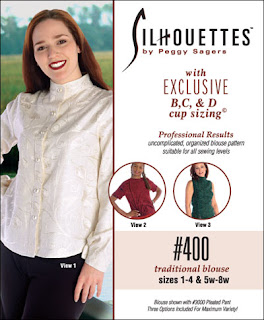
The dress is Silhouette Patterns Traditional blouse, number 400 view 2 extended to knee length. It is a favourite blouse pattern for woven fabrics used many times.
The pattern is described as offering a variety of optional looks with basic results. Mandarin, jewel neck or turtleneck collars are available with woven or knit fabrics. Long or short sleeves are also options for each view. These blouses are the greatest basic to any wardrobe!
The pattern alterations
The dress is based on the size 2 D-cup pattern; graded down to the size 1 at the waist and hips; wider waist darts in the front to provide more shape; shoulders narrowed slightly; and a 1/2 inch forward shoulder adjustment. The length was extended to 43 inches at centre back, allowing a 2 inch hem.
I measured a favourite slightly A-line skirt to determine the circumference at the hem (46 inches). I did wonder about making a straight skirt but wasn't keen on having the split for sufficient walking ease. Recently I learnt (from a Peggy Sagers webcast possibly the one on Amy's skirt) that a true straight skirt is the width of the hips minus 4 inches and I really don't think I would have been able to stride along without a split in a skirt with a 36 inch hem circumference.
Because of the fabric pattern I decided to use cap sleeves instead of a set-in sleeve. I also had quite limited fabric for a dress having only purchased 1.5 metres.
Not really an alteration but I cut the dress twice once each from the fashion and lining fabrics.
The sewing
For the lining I folded out the bust dart at the side seam but otherwise left the bust and waist darts unstitched. Just stitched the darts in the fashion fabric.
The centre back seam was sewn in the fashion fabric leaving the top 8 inches open for the zip. I used an ancient zip purchased during my sewing days in England probably nearly 30 years ago. Despite being shorter than the usual length for a dress zip it does the job and is an amazing colour match considering it came out of the stash. I even managed to remember how to do a lapped zipper although I had to do a hand prick stitch to keep it in place. (I only machine stitched the zip to the centre back seam as I didn't want the stitches to show on the garment right side and the prick stitch is practically invisible.)
The dress and lining were constructed separately, nothing fancy the seams were just sewn and pressed open, with the shoulder seams left open. The two were then joined at the neck and armhole edges. The neckline and armholes were under-stitched and lie nice and flat. The lining was machine sewn to the dress centre back seam at the zip opening.
A french seam was used for the shoulder seam with the dress and lining fabrics sewn as one.
The fashion fabric and lining were hemmed separately, the lining by machine and the fashion fabric by hand.
On Easter Sunday afternoon I set the sewing machine up on the table in the dining nook with the ironing board nearby and cup of tea close at hand.
Just for fun here is a sepia-ish version of the sewing almost in action.
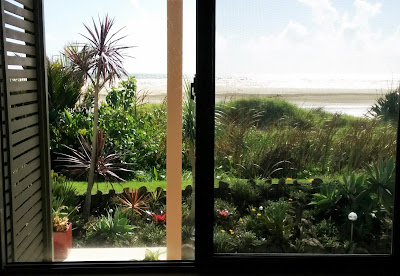
The view from the temporary sewing spot.
The travelling Featherweight
My beloved Featherweight flew safely, as carry-on, packaged in its little black padded bag (the original hard case stays safely at home). The two sewing projects and other associated paraphernalia carefully packed around it. According to the bathroom scales it weighed 7.6 kg. Of its three flights it was only stopped once by security to check that what it seemed to be it actually was.
The styling
Keeping it simple with my charcoal grey me-made jacket and United Nude Fold shoes in colourway Horizon.
Here is a close-up of the little jacket made many years ago from a 1990 Donna Karan pattern V2494 using a felted piece of merino jersey, with a simple American smocking design to jazz up the fronts.









Wow, that's amazing. I'm impressed on many fronts. Not least that you finished a garment on holiday - that's dedication. Absolutely love the border print, the dress was an inspired use for it. Finally great alteration and fit as always:-)
ReplyDelete