The Fabric
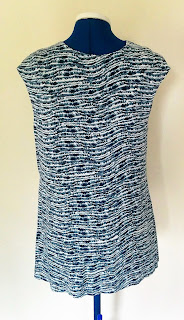
Both of these versions use a knit fabric. The zebra print was from Stonemountain and Daughter and the blue wavy stripe was from Marcy Tilton. Neither of these fabrics spent very long maturing in the stash. The zebra was bought in September 2016 and the blue wavy stripe was a post Christmas 2016 purchase.
The pattern
A Tracy Reese pattern from 2010. Described on the pattern envelope as a loose-fitting sleeveless top has neckline drape, extended shoulder, front gathers, darts, back opening with neck binding and invisible zipper, lined shoulder pads and optional ribbon belt.
The Pattern Alterations
For both of these knit versions I used the same pattern alterations as the original Liberty version because I didn't want the top to be close fitting, just wanted the drape from the knit. The only thing I did differently was to narrow the back ¾ of an inch and cut centre back on the fold as I knew I wouldn't need the back opening.
For the original Liberty version I made a few alterations:
- Started from the size 10 which has a finished garment measurement of 40½ inches at the bust and tapered out from the underarm seam to a 16 at the waist (36½ inches). Giving me 2 inches of ease at the bust and 4 at the waist.
- Added 5 inches of additional depth to the cowl facing curving down at the sides so that where the cowl wrapped around the shoulder seam it ended at the notch.
- Modified the shoulders at the shoulder edge by adding ¼ inch for the back and removing ¾ inch from the front, tapering to nothing at the neck edge. This effectively removed the ¼ inch both front and back of additional height for the should pads I wasn't going to use and made a ½ inch forward shoulder adjustment (remove ½ inch from the front and add to the back at the shoulder edge tapering to nothing at the neck edge).
- Raised the armhole ½ inch, post shoulder adjustments, based on the armhole size I prefer for a sleeveless garment.
- No FBA required for this pattern. Unusually for me the bust point didn't need to be lowered either.
- I could also get the top over my head without the back opening so I omitted the invisible zipper.
The Sewing
These were a fast simple make on the overlocker for the shoulder and side seams.
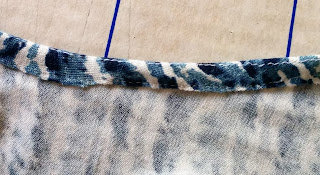
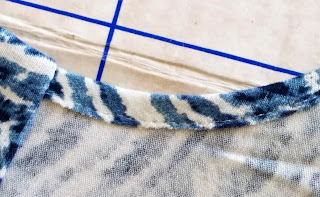
The neck edge, and armholes were pressed and hemmed using the same technique. A basting stitch was stitched 3/8 inch from the edge (use the edge of the presser foot as a guide because most standard presser feet are 3/8 inch from needle point to the foot edge). The hem allowance was pressed over with the basting stitch slightly on the inside of the folded edge (photo 1). The hem was then stitched down from the right side and the basting stitch removed (photo 2).
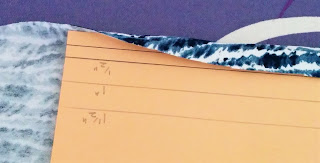
For the hem the edge was turned up the desired amount using the markings on the file folder and pressed in place then stitched from the right side.
The zebra version needs some remedial attention. For some reason the under bust gathers and seam are nowhere near the under bust. The photo here is worse than in real life but even in real life it is noticeable. The shoulder seam will be undone and ½ inch removed. I will remove garment length at the shoulder seam because the armhole is too low displaying a bit of bra which I hate. (There is no bra on display with the blue knit even though it looks like there is in the photos above.) I will also undo the under bust seam and remove about an inch from the centre front tapering to nothing at the side seams of the top half only.
The Original Version
For this version I used french seams at the shoulder, centre back and side seams. The back neck edge and hem used purchased cream satin bias binding sewn right sides together then turned to the wrong side and catch-stitched in place. The armholes were bound with the same cream satin bias binding, sewn right sides together then folded over to the wrong side and stitched in the ditch from the right side.


I like the neckline on this pattern and well done for using the fabrics so quickly after purchase.
ReplyDelete