My wardrobe has been in need of a red cardigan for some time as I mislaid my red knitted shrug and the long Fjord Cardigan I made in early 2019 was donated due to the scratchy fabric. Enter the Style Arc Palermo knit jacket and a smallish cut of a red plaid woven wool/alpaca coating weight fabric. The idea came to me as I was nodding off to sleep on Friday and by Sunday evening the jacket was made. It then took me five weeks to write this blog post. In my defence it is Christmas and there is a lot going on!!
The finished garment
Here is the weekend version of the Palermo Red Plaid jacket worn with WORLD Cut Make Trim Mayrose tee, Andrea Moore Boyfriend jeans and P448 Skate Pailettes Stroil Sneakers. Loved it so much I coordinated my Saturday outfit to go with it, even after wearing it all week.
Having no stretch in the fabric does make it a bit less mobile than the first version but I don't find it bothersome and am really happy with how this turned out. Especially as despite not being able to do any plaid matching it came out in a very pleasing way - no jarring points to make the sewist's eye twitch.
The fabric
This fabric was bought for a different pattern the Diane Ericson French Fold Shrug but the making never quite happened. Then I thought it would be a Papercut Patterns Fjord Cardi but I couldn't get the lines of the plaid to match and had very little fabric to play with having only purchased 1.2 metres so the project was abandoned. Third time lucky was the idea of making the Style Arc Palermo Knit Jacket.
The red plaid is a wool alpaca blend coating fabric and the lining is a lovely silk twill (allegedly a Marc Jacobs fabric). Both were from The Fabric Store last Winter.
The pattern
Style Arc describe the pattern as "perfect if you are taking it easy and looking for ultimate comfort without sacrificing your style. The Palermo Jacket features interesting design lines, that are surprisingly created with only two pattern pieces! The relaxed look contours the neck and sits just below the waist. A shrug style jacket featuring long sleeves, neck hugging collar and interesting design lines."
Suggested fabrics are: sweater knit or any fabric with slight stretch and drape. The wool alpaca mix woven coating fabric chosen for this version has nice drape but no stretch. The combination of the coating fabric and lining do make this more jacket like than shrug.
The pattern card
The pattern alterations
There were two improvements that I identified after making the first Palermo jacket: (1) the sleeves at the hem were a bit tight; (2) for a 1" hem some extra fabric was needed at the side seam hem edge in order to have enough fabric to lay flat when turned up.
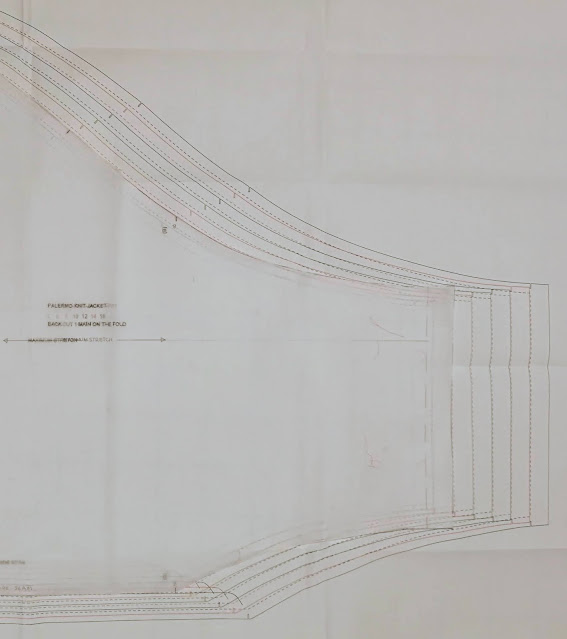
For the sleeves I looked at the original pattern and decided to curve the sleeves out from the size 6 at marking B to size 12 at the hem. This gave me an extra ½" on both sides. As I was using a 1" hem I ensured the sleeve seam was the same width for 2" up from the hem. Altering the sleeve curve was easy laying the French curve next to the pattern at point B and at the size 12 point 2" up from the hem.
 |
| Back pattern piece with sleeves curved out to size 12 at the hem |
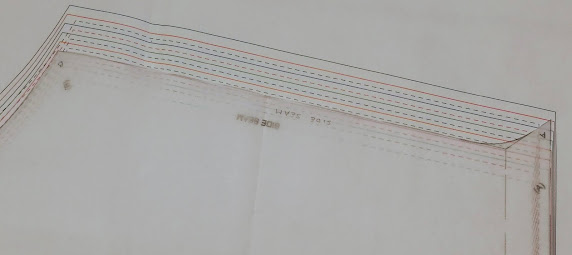
To get the extra width at the hem on the front side seam I measured out 1" at the hem edge and laid the French curve on the pattern at the side seam and curved out to the extended hem edge. The curve makes the addition measure 1" at the side seam. If I had done a diagonal line it would have been more than 1" and the front and back side seams wouldn't have matched.
 |
| Front pattern piece with extra 1" at side seam hem cut edge |
As I used a wool alpaca coating the jacket needed to be lined. For the back lining I used the same pattern piece as for the back jacket but with the pattern centre back fold 1" in from the folded edge of the fabric providing an extra 2" of fabric for a box pleat. For the front I cut a new lining piece removing the facing (minus seam allowance)
The sewing
As mentioned the first time I made this as long as you carefully mark the A, B, C notations (with snips in the fabric) Style Arc's assessment of this jacket as an easy make is appropriate. As I was intending to line the jacket all seams were sewn with a straight stitch on the Bernina 830. As an aside having owned the Bernina 830 since January 2012 I think I am finally comfortable with it. At long last I understand how to thread the bobbin and even the recent bit of machine embroidery I did turned out better than it ever has before.
I still used the Style Arc instructions with their informative little diagrams to make sure the right bits were being sewn together. As ever with a pattern with interesting shapes it is easy to confuse which bit is what and not sew the correct parts together.
Once again there were three instances where I didn't follow the instructions:
- After the side seam was sewn I sewed the centre back collar seam together. Then I folded the sleeves in half and sewed from the right sleeve hem up the arm, round the back neck edge down the left arm to the hem in one continuous seam.
- When I attached the shawl collar to the back neck edge I didn't sew in the outer fabric facing. The entire facing (front opening and collar) were sewn to the lining at the end.
- Hem depth was increased to 1" for sleeves and garment body
The outer jacket and lining were both made in their entirety, apart from sewing the facing and hems. The hems (sleeve and body) of the jacket outer were turned up and pressed in place before the lining was attached, as it is easier to do at this stage than after the lining has been sewn in.
The lining was pinned to the garment body at the facing but before sewing it I sewed the bottom hems of the outer and lining together for a couple of inches using a ⅜" seam allowance. Then I could sew the lining to the facing by machine without any hand stitching.
The lining arm was stuffed down the outer arm and pinned at the seam. This ensures that the arm is not twisted when the hems are sewn together. Turn sleeves wrong side out through the hem opening, pull the sleeves apart so they are facing each other - joined at the seam by the pin. Remove the pin, roll lining so wrong side is out and re-pin just to make sure you are not twisting the sleeve as you line up the raw edges of jacket and lining sleeve hems. Sew with a ⅜" seam allowance. Pull the jacket outer sleeve sight sides out and the lining will follow. Because the sleeve hem had already been pressed in place the sleeves are now finished.
Turn the jacket outer and lining body right sides together and pin together at the hem. The sleeves will be inside between the right sides of the outer jacket and lining body. Sew together with a ⅜" seam allowance, leaving an opening at centre back large enough for the jacket to be pulled through to turn right side out. That small opening at centre back is the only bit of the jacket that needs to be hand sewn (with a fell stitch). I didn't need to stitch the garment hem to the body as you normally would, it stays in place just sewn to the lining.
Once the jacket and lining were turned right sides out I sewed them together at the back neck edge. The seams of the back neck edge were carefully aligned (outer and lining) and then sewn together by stitching in the ditch of the back neck seam with the jacket outer up and the lining against the feed dogs. As the seams were carefully aligned the stitches cannot be seen on either the jacket outer or lining. The back neck edge is the only place (apart from the hems and facing) that the lining and garment are attached.
The pattern alterations for this worked well as all the pieces sewed together really easily.
The week of outfits 1
The Palermo Red Plaid jacket so met my vision of what I wanted that it had to be worn immediately. My work outfits for the week were chosen on the basis that they went with my new jacket. I felt really good in what I wore all week.
Wednesday: Vogue 9243 Twirling Rebecca Taylor dress (fabric also from Silhouette Patterns) and Suzi Roher belt
Thursday: Megan Nielsen Flint Prince of Wales Check trousers with WORLD Make it Right Black T
Special thanks to the photographer who had better things to do with his Sunday afternoon but waited patiently whilst I changed my outfits in order to recreate the looks from the week at work.
The week of outfits 2 - the Christmas edition
As it took me so long to write this blog post there is a second week of work outfits - Christmas themed in celebration of the season and my last week at work in 2020. Could also be labelled the week of the dress!
Thursday: Silhouette Traditional Peppermint Patty dress


I imagine this is a very satisfying result considering how versatile it has proved to be. Is it as cozy as it looks? All those outfits look amazing. I particularly like the Vogue 1250 DKNY dress from the first Tuesday. Good to see Nigel busy at work :-)
ReplyDeleteSometimes garments don't come out as you planned but this one was everything I could wish for including being cosy (and snuggly warm!) It is interesting taking photographs of the outfits you wear as some, like the Tuesday one you pointed out, look nicer than your eye sees in the mirror and some look worse. It makes me wonder about taking an OOD photograph every day but I am so hopeless at remembering don't think it will ever happen.
DeleteN said some of the trees had to go and now they are gone!