As the pattern isn't quite ready for the good fabric I have another piece of heavy denim fabric (with a pewter coloured coating) from The Fabric Store specifically purchased to make a second hopefully improved wearable muslin of these trousers. The coloured mote jeans are a very wearable version of the P&W trousers and have been getting a lot of wear but there is always room for improvement!
The finished garment
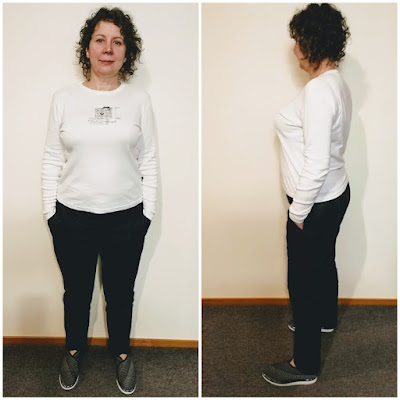
After quite a bit of finagling I am finally happy with the fit of these trousers. More tweaks are needed but they are good enough for outings in public.Whilst relatively fitted they are not skinny jeans so are good to wear with more fitted tops.
 |
| Finished garment post back seam tweaks |
 |
| Finished garment pre back seam tweaks |
The fabric
This Robert Kaufman 11.6oz denim with coloured motes is quite firm and I wasn't entirely sure I liked it so was very happy to sacrifice it in the event the P&W trousers were more muslin than wearable.
The first time the fabric was washed quite a lot of the dye came out. Luckily it was being washed on its own in Coca-Cola to try and soften it a bit. The finished trousers are a bit softer but I am tempted to give them another couple of Coca-Cola washes as I have become quite attached to these trousers and it would be worthwhile getting them even softer.
The pattern
This is an older Papercut pattern that is no longer available, although the Otsu Jeans are inspired by the Peter and the Wolf trousers.
They are described as a mid-rise skinny pant with side invisible zipper and scalloped hem. Centre front and centre back seaming on legs. Back yoke and half front yoke. Side pockets.
The fabric recommendations are a light to medium weight stretch woven fabric. My favourite picks would be cotton, linen or a gorgeous silk. As long as you don't go too heavy or light these could be made out of anything.
So of course with those fabric recommendations in mind I chose a heavyweight non-stretch denim - just ideal for the job!
The pattern alterations
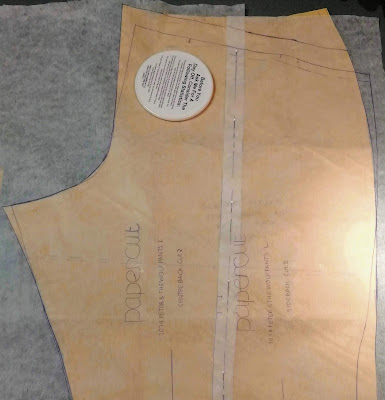
You can tell from the back of the pattern that alterations will be needed. I chose my size based on the finished garment measurements for the hip, including the amount of ease I like.The easiest way to decide on ease for trousers is to sit down and measure your widest part (not always the hips) and your thigh at the very top of your leg. It is generally easier to start with the hips and shape in to the waist size you want using a French curve.
The ease allowed in these trousers according to the back of the envelope is strange, with 4" of ease at the waist and just over 1" of ease at the hips. Sandra Betzina's personal preference (according to her Fast Fit book) for a fitted pant is ½" at the waist; 2" at the hip; and 2-3" at the thigh. I find that I have enough fluff around my middle that 0 to ½" is plenty of ease at my waist. My thighs spread 2" when I sit down so in a non-stretch fabric I allow 2½ to 3" of ease, depending on how much give I think the fabric will have naturally.
If I was making these trousers in a stretch fabric, the ease would depend on the amount of stretch the fabric had with zero ease being the starting point going to negative ease for very stretchy fabric when making skinny trousers. Of course you can make these trousers more closely resemble a boyfriend jean as I did.
I traced off the size large onto my pattern paper as a starting point based on my measurements
Before I start talking about the alterations I made I should disclose that I started off comparing the sizing to my Silhouette Patterns Lana's jeans and I think there are a couple of areas where this led me astray. The shape of the legs, crotch depth and the front rise.
 |
| The front - Papercut P&W jeans on top of brown paper Lana's jeans pattern |
 |
| The back - Papercut P&W jeans on top of brown paper Lana's jeans pattern |
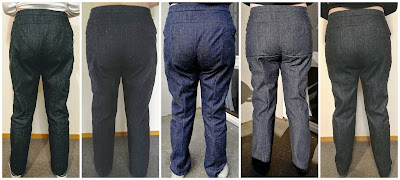
The back crotch depth needs to be increased slightly to remove the smile lines.
 |
| The progression of tweaks from the start at the left to the end at the right |
The sewing
On the P&W trousers the zip is in the side seam. As I was using stiff denim fabric I wanted a fly front zipper and used the patterns pieces from Silhouette Patterns Lana's Jeans to achieve this.All of the fabric edges were overlocked before the trousers were sewn together with a ⅜" seam allowance.
I followed the pattern instructions to assemble each leg, front and back including stitching the back crotch seam.
For the front of the trousers once I had each leg made I used the Lana's jeans instructions to insert the fly zipper. The front and back legs were then sewn together at the inseam.
 |
| These trousers have a really neat front pocket and whilst not normally a pocket girl I keep sticking my hands in these |
To make these trousers more flexible to accommodate my changing shape the waistband was cut with a side seam allowance. Then I sewed: (1) the outer waistband onto the front and back of the trousers; (2) the side seams of the trousers and the waistband; and (3) folded the waistband down to the inside and stitched in the ditch from the right side.
The trousers have a shaped bottom and the hem is faced. The shaping is a really neat feature but when the trousers are worn it isn't really noticeable. If you look for it you can see the high low hem in the side view of the finished garment photographs.
As I used the Singer Featherweight to sew the trousers I decided to use the Singer buttonholer rather than get my big Bernina out of hibernation. When I use the Singer buttonholer I go around the buttonhole twice as I like this finish better.
The ingenuity of these old Singer gadgets is amazing. The only limitation with the buttonholer is the need to use buttons that match the size of the templates. Unlike today's modern machines where the button hole can be varied infinitely to match the size and thickness of your button.
 |
| Top: buttonholer with template ready to insert; Bottom: template inserted |
Outfit of the day
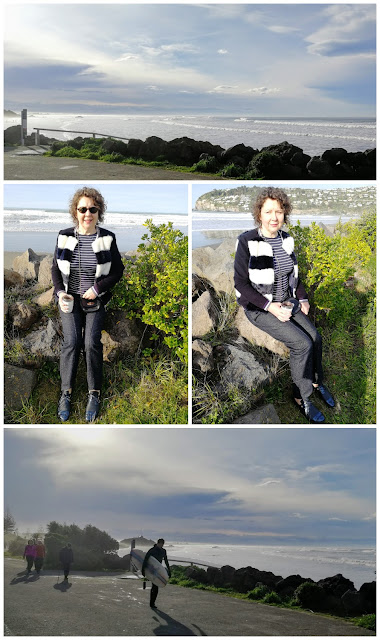
A sunny but not brilliantly warm day walking along the beach at Sumner. Our favourite place for a Sunday afternoon stroll. It was warm enough for my beloved to have an ice-cream but I stuck with a nice warming cup of coffee. The waves were big enough for lots of the local surfers to be out on the water practising their skills. |
| This is the outfit of the day (or two) before they were taken apart and altered at the centre back seam |


I luv the fabric for your jeans with the tiny flecks of color. And oh my, the patience you have in fitting and tweaking your jeans to fit. The coat already looks amazing.
ReplyDeleteSometimes I love spending the time making the little tweaks to get them just so and other times they either work first time or are in the bin. These obviously had potential and just needed a little...
DeleteThanks for your words of encouragement about the coat it really isn't feeling the love.
Thanks for posting your trousers and process. Neato! Amy
ReplyDeleteThanks Amy. For a pattern that is out of print when you use it I do wonder whether it is worth fully documenting the process but I do because I can't stop myself - just love the nitty gritty detail!
Delete